
Lightroom is an excellent application that’s made for speedy and efficient editing. But If you’re making all of the adjustments with an actual mouse might observe that every single operation begins to add up until you’ve spent hours and hours dragging your cursor around and clicking the mouse and so on.
It’s a good thing that Adobe included a number of helpful Lightroom keyboard shortcuts, which all are designed to simplify the lives of photographers and editors. Below, I will share handful of the most important shortcuts that help you improve your workflow, increase the efficiency of editing as well as access other hidden options.
Are you ready to become an Lightroom shortcut master? Let’s begin by diving right in to begin with:
1. Uncover all possible shortcuts
Lightroom has a myriad of shortcuts, a lot of which are hard to remember, especially when you don’t use frequently.
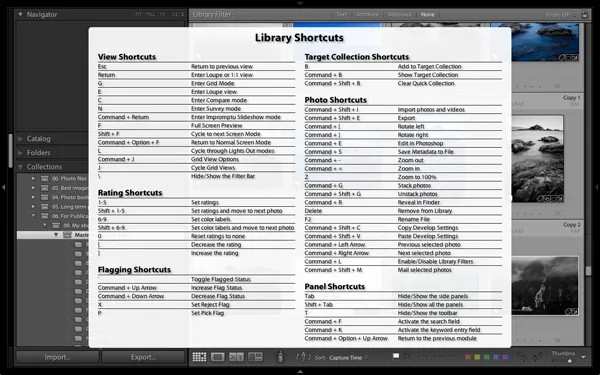
You can, however, press Ctrl/Cmd+or to display a list. will open that shows the shortcuts you can use within your current program. So, if you’re currently working with your Library module it will show all of the Library modules shortcuts.
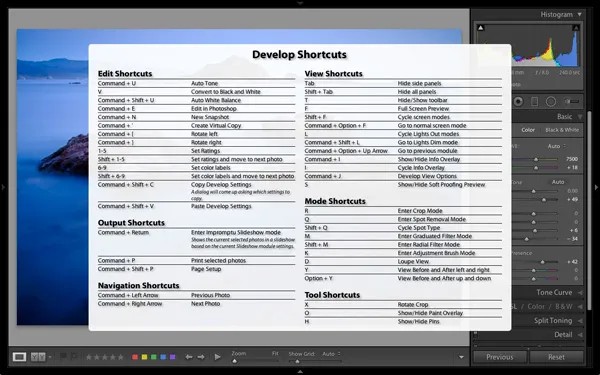
If you’re working within your development module This shortcut will display the shortcuts for the Develop module:
(Once you’re finished with this post, I strongly suggest you go to Lightroom and go through the shortcuts for each of the Library as well as the Develop modules. It’s almost guaranteed that you’ll gain some new knowledge!)
After you’ve completed reviewing your shortcut choices, simply select a shortcut to block it.
2. Press “R” to open the crop function.
This is a basic one however it’s a huge time saver. When you want to crop an image just go to the Develop module and hit on the key R.key. A crop-overlay will then be displayed:
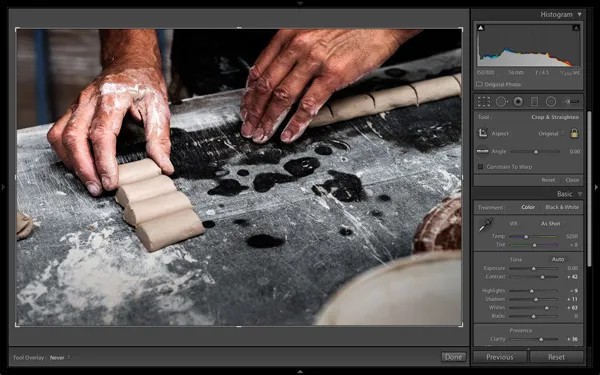
You can then get to the work of cropping your files!
If you don’t agree with the orientation of the crop overlay you can tap the X and then watch the overlay rotate:
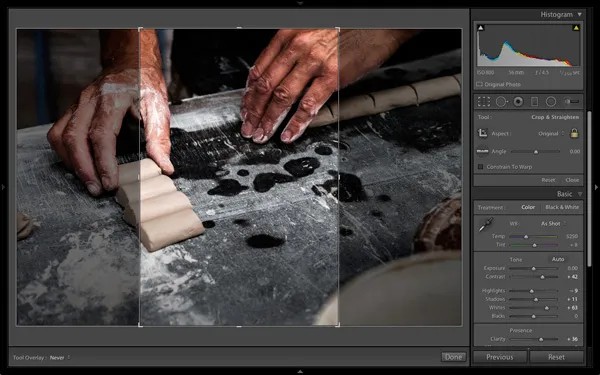
This can be particularly useful when you’re trying to cut images of portraits that has an aspect ratio that is landscape, and vice versa since Lightroom automatically generates crop overlays that correspond to the orientation of the file.
3. Utilize the “key “/” key to increase the size of the image
Lightroom comes with several healing options that can be controlled using The “Q”key. Each mode approaches the healing process, which removes the content of the image by summing up content different locationsin the image in a different way.
The great aspect of The great thing about software Lightroom’s Healing can be that is proficient in determining what part of the image it will take to get a natural result. It’s an excellent method to remove imperfections in facial hair, dust spots flaws, as well as the distracting dirt or stones in the ground surrounding the photo.
But, despite the Healing tool’s incredible capabilities, it’s not doing the perfect job of sampling every single timethe time. This is where this shortcut is useful!
Begin by choosing any of the available healing options and then clicking on the image. If you do not like the option of sampling, simply hit the key /key button, and Lightroom will select another portion of your image to test. Repeat this process for as many times as you want until you’re satisfied with the outcome!
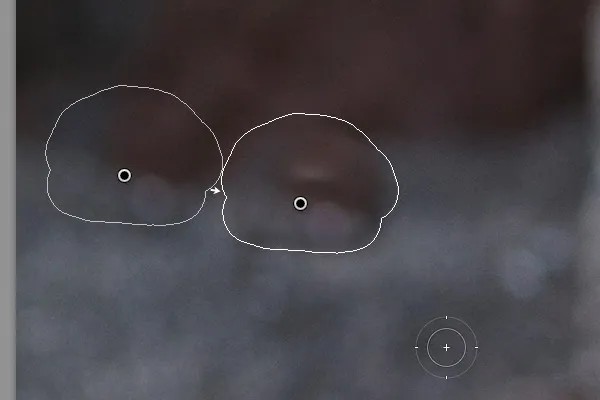
In this second (zoomed-in) image I was looking to remove this dark blob that was distracting in the background

However, Lightroom’s initial guess wasn’t very effective:
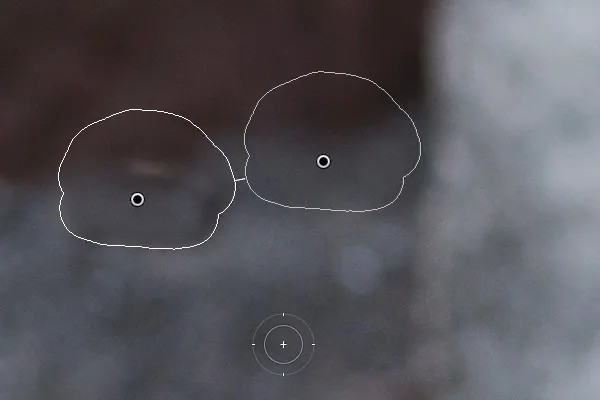
When I pressed on the shortcut, Lightroom resampled the image with the results superior:
Tips: In the event that you are constantly trying to sample the image again and cannot heal the image successfully You can always try sampling the image manually using your mouse (though it takes much longer than by using an shortcut).
4. Utilize using the “Shift” button to make sure that the black and white points.
RAW images can look somewhat flat. one easy method to add some interest is by creating a white and black point you adjust the slider for Whites until the brightest tones stretch out to the right-hand side of the histogram and then altering the Blacks slider until the darkest tones stretch out to the left of the image.
The process of establishing the black and white point isn’t easy If you don’t know a tiny shortcut!
Normally, when you double-click either of Whites and Blacks sliders in the Basic panel, Lightroom resets them to zero. If you hold Shiftwhile clicking on the sliders Lightroom determines the best place to set both sliders to ensure that the histogram extends to the left-hand side on the graph (shadows) towards the left (highlights):
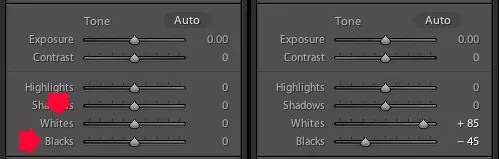
This quick fix makes most photos look better right away!
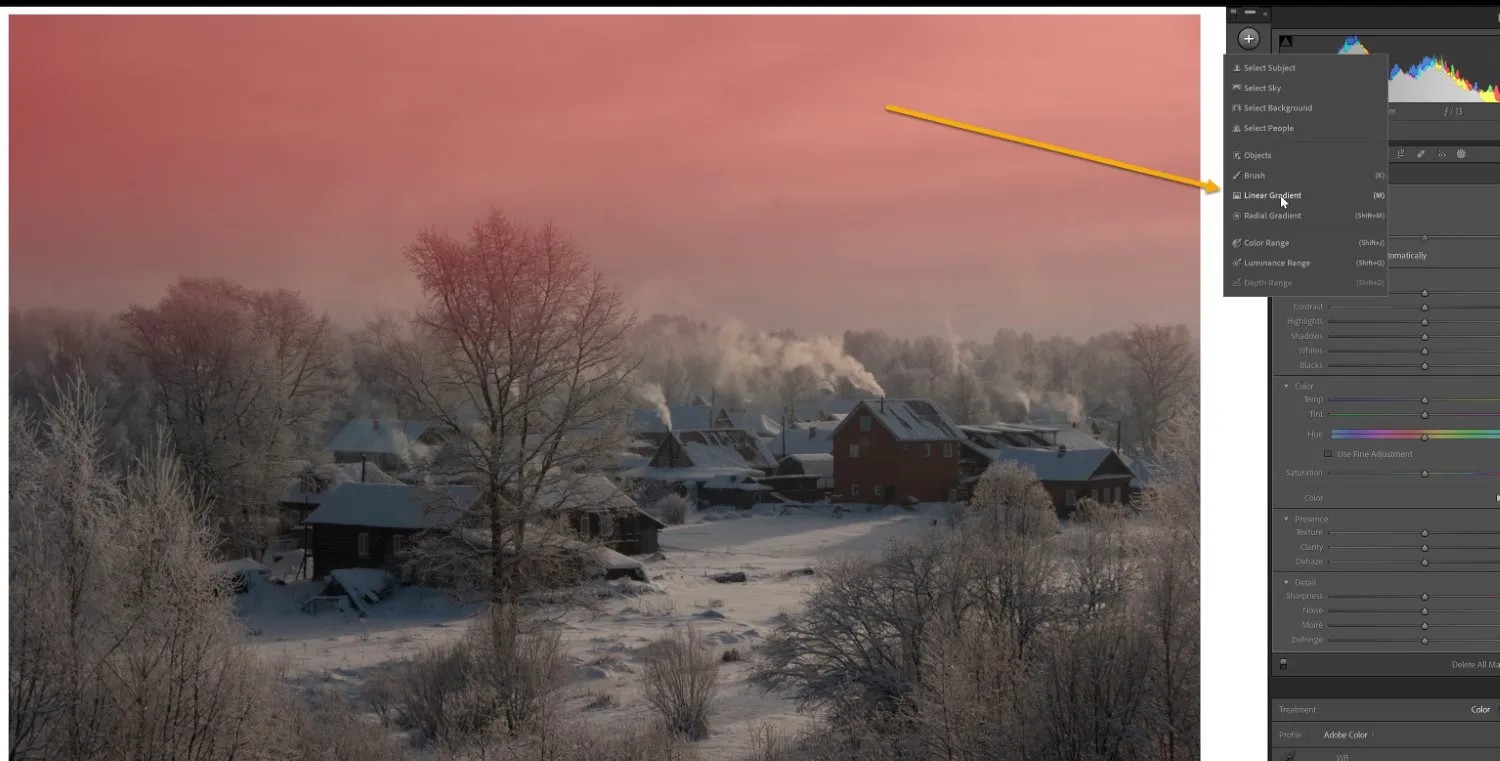
5. Use the apostrophe key reverse the direction of a Linear Gradient
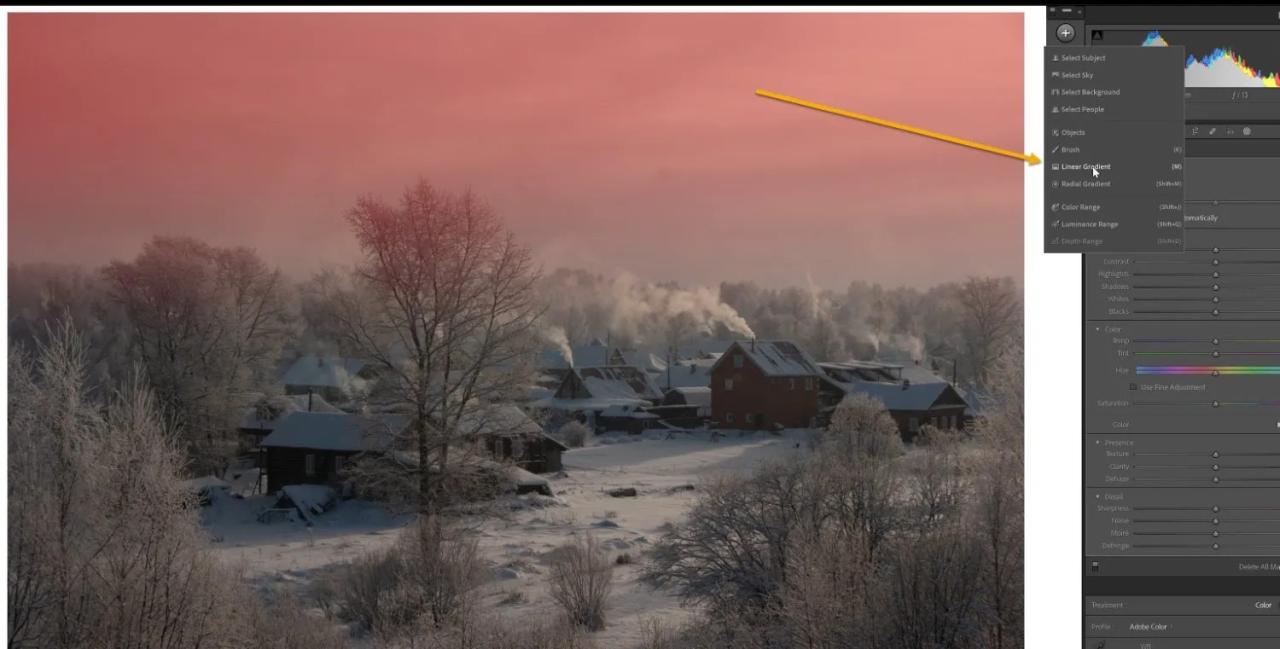
Lightroom provides a variety of local adjustment tools which include the Brush as well as the Radial Gradient (formerly named the Radial filter) and the Linear Gradient (formerly called”the Graduated filter).
The Linear Gradient lets you apply natural-looking adjustments to certain areas of the photo for example, the sky or foreground of a landscape without affecting the other elements of the scene. In normal circumstances, you’d create Linear Gradient (you can press shift+w for the Masking panel) Then drag it across the foreground or the sky of your image according to your preference.
But what happens if you want in reverse direction the result? Simply press the apostrophe key (‘-‘) ‘– and the Linear Gradient will change direction!
Here’s a great method to utilize this shortcut
- Make a linear gradient on the sky of the landscape. Reduce the slider for Exposure to darken that region.
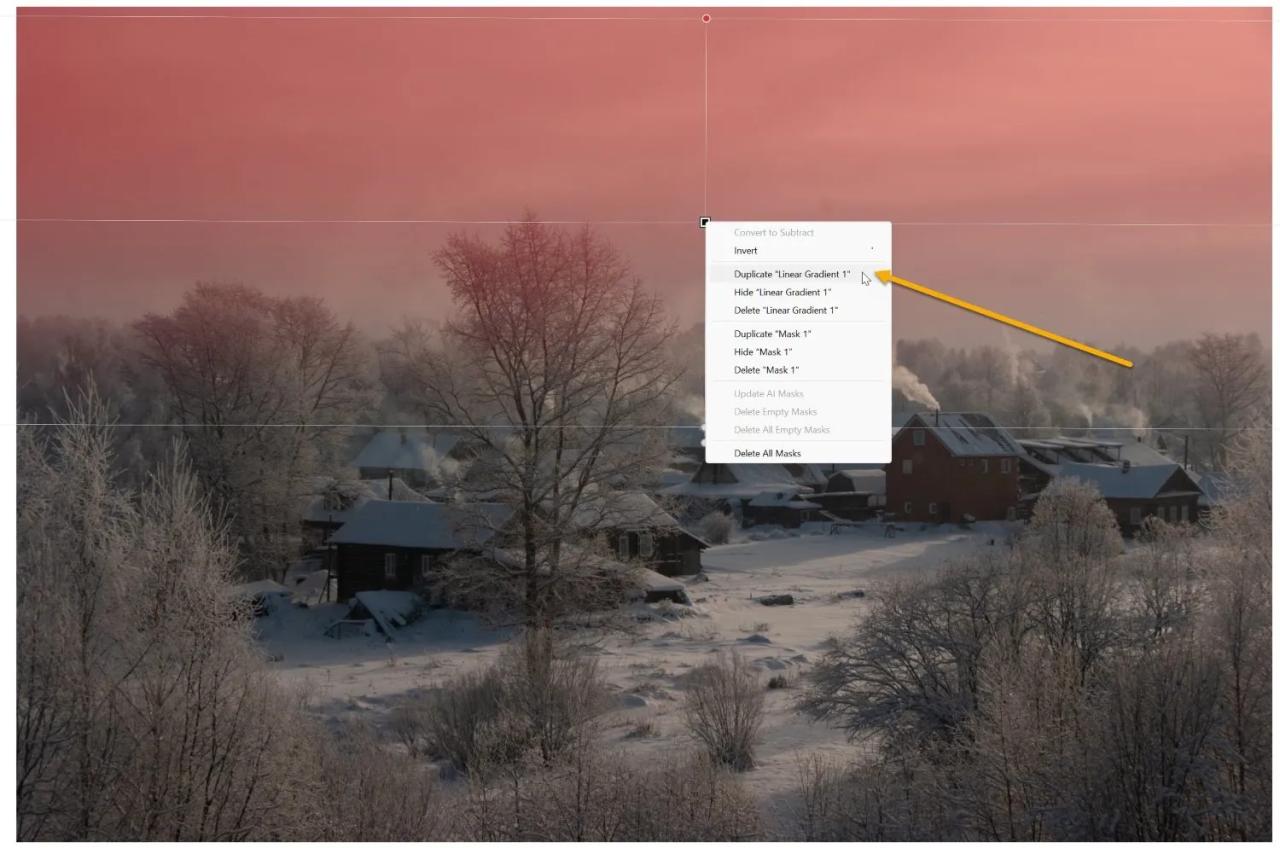
- Right-click on the Gradient’s Pin. Choose the option to duplicate to create an entirely new Linear Gradient using identical settings as the previous.
- Use the apostrophe key to change the Gradient. The negative exposure option will then be reflected to the background, but you’re probably not looking to darken the background Instead, double-click the Exposure slider and reset it to 0.
- Now, you’re ready to apply this Linear Gradient to improve the foreground. You can increase your clarity slider to emphasise the texture of the foreground. You can also subtle reduce the brightness of the foreground by removing your Exposure slider (which helps to maintain an impression of depth and drama).
Once you’ve made the changes above and you’ll be left with a stunning file that has been modified with 2 Linear Gradients!

Keyboard shortcuts in Lightroom: last words
Once you’ve completed this article, you’re set to go into Lightroom and create stunning edits and improve your workflow by using these useful shortcuts.
So what are you sitting to do? Make sure you are processing!