
Are you looking for tricks and tips to improve the workflow of your team, boost speed, and improve editing capabilities? You’ve come to the right spot.
I’ve used Lightroom for more than a decade. In this article, I’ll provide my top tips for achieving stunning results. This includes:
- The panel everyone should utilize to make beautiful editing and artistic effects
- A simple way to apply complicated edits with high speed
- The most effective tools to create refined, professionaleffects
Let’s get this done!
1. Make color harmony using the HSL panel
If you’ve never used Lightroom’s lightroom HSL panel and you’re not sure what it is, then you’re getting an experience. There’s a small option under the Tone Curve which is like this:
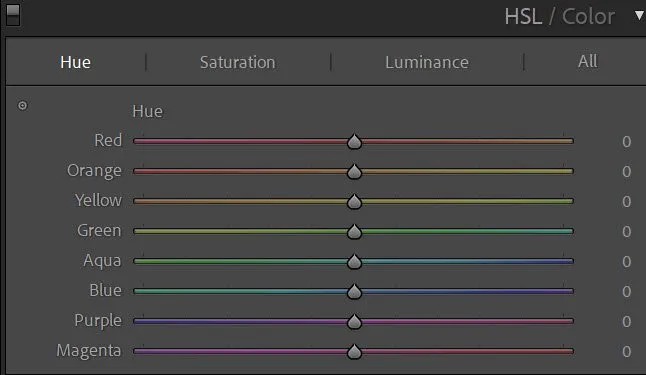
The panel operates by focusing on the different colors in a way that is independent of each other. It is possible to alter justthe reds in the image, or you can increase the brightness of justthe greens or reduce justthe blues. Select the appropriate color slider, and then make the appropriate adjustments.
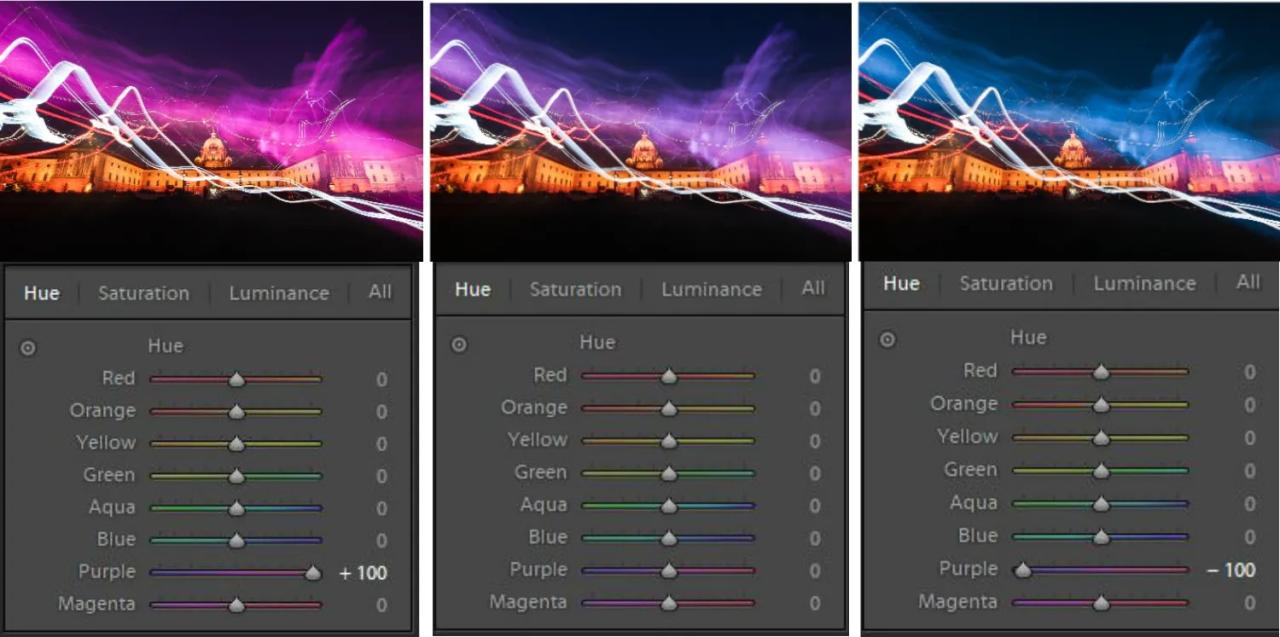
Take note you’ll need to know that the HSL panel allows you to adjust hues in three distinct ways. You can:
- Alter the hue of your color. You could make the reds orange and the purples more pink, or make the blues greener.
- Change color saturation. It is possible to make blues appear more faded or reds more powerful.
- Change color luminance. You can increase the brightness of the greens, tone down the blues or brighten the yellows.
If you’re just beginning I’d recommend just playing with different sliders until you achieve an effect you like However, here are some ideas to test:
- Eliminate all cool colors of an image to give it an edgy, cinematic style
- Colorize the main subject, while reducing the colors in the background.
- Try to push several colors together to create a more simple palette of colors (and more harmonious results)
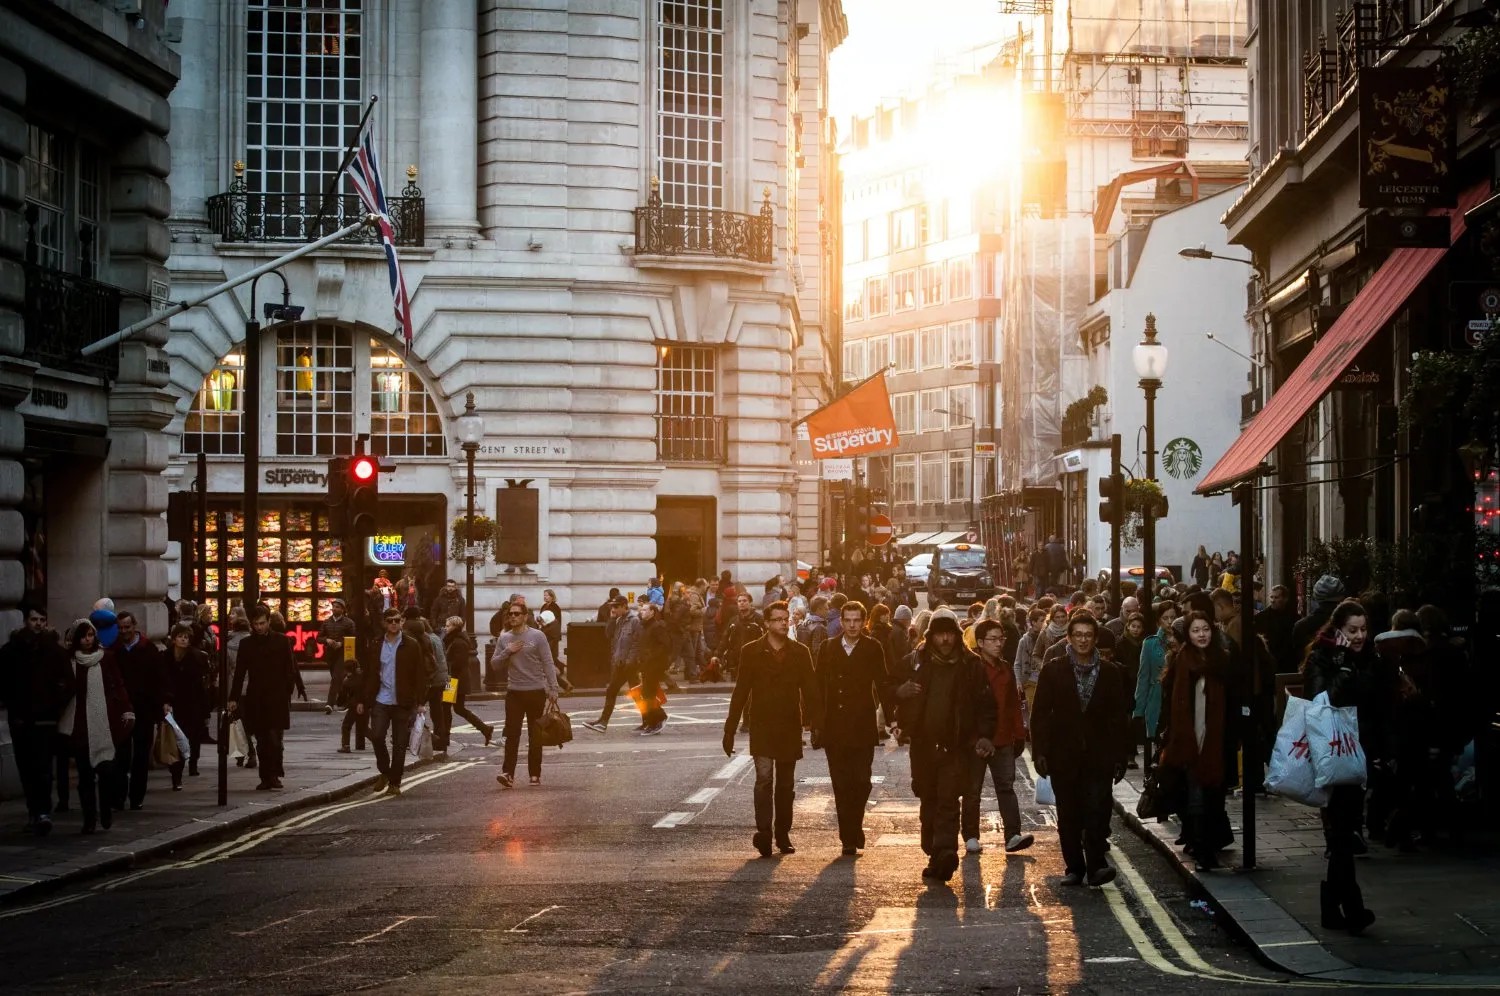
This photo, for example has a warm color palette (which is created by reducing the saturation of greens, blues, and magentas ).

2. Try the auto slider adjustment
Sometimes, it’s difficult to figure out what to do first (or carry on) the process of a Lightroom edit.
In such situations I would suggest a tiny tip:
Press the Shift key Then double-click the sliders on the basic panel. Lightroom will examine your image and make adjustments automatically.
Edits may not always be perfect, but they usually appear pleasing. If you don’t like the outcome then you can double-click the slider’s name to reset it to zero. You can also make use of the auto settings as your starting point to edit them from.
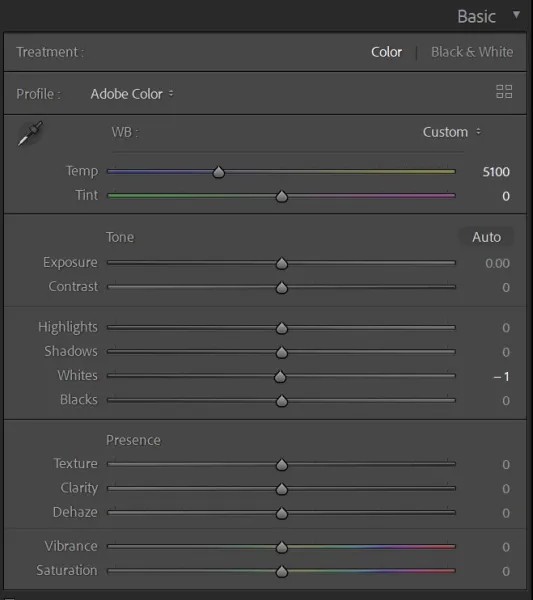
If you’d like to view all of the Lightroom’s automatic edits all at once, simply hit to the Autobutton just above the slider for exposure:slider:
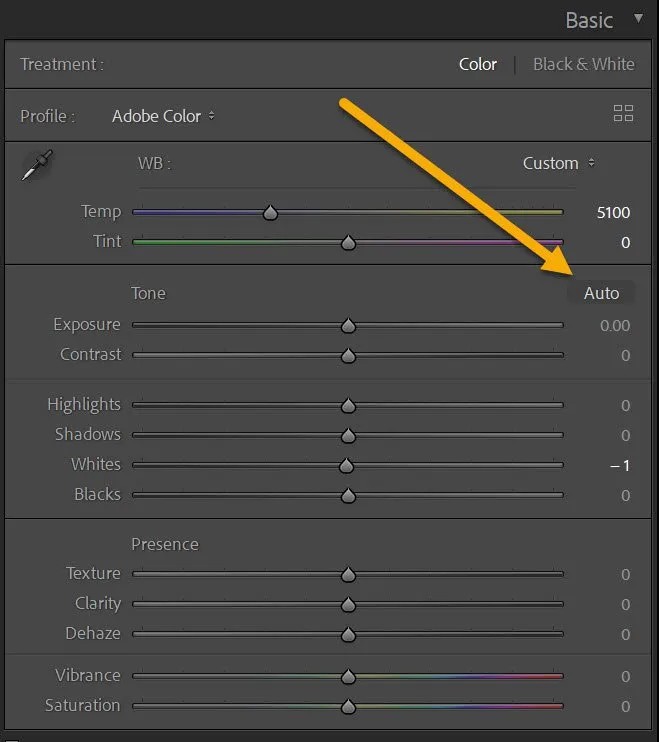
It will instantly alter the sliders of The Basic Panel!
These automatic adjustments aren’t compatible with the majority of Lightroom sliders. They will not work outside of the Basic panel and won’t apply to those sliders, including the Texture the Clarity or Dehaze sliders.
However, there is a possibility that you are able touse it to alter your the white balance and the brightness, the exposure and even the saturation. So why not try it and check out your results?
3. Make use of Clipping Masks (or the warnings about clipping)
Clipping is the loss of clarity in the highlights and/or shadows in an image and generally the clipping process is quite awful.
It can be difficult to determine if you’re actually capturing details when editing. It’s also possible to cause more problems with clipping by increasing your sliders without even realizing it. It is always advisable to monitor your histogram but it could be difficult to read particularly for novices.
Happily, Lightroom has a solution using the clipping masks that clearly show the clipping at any time.
Before you alter the Exposure Highlights, Shadows, Whites as well as the Blacks slider, just hold either the Alt/Opt key. When you adjust or reduce these sliders, you’ll notice either a black or white overlay, such as:
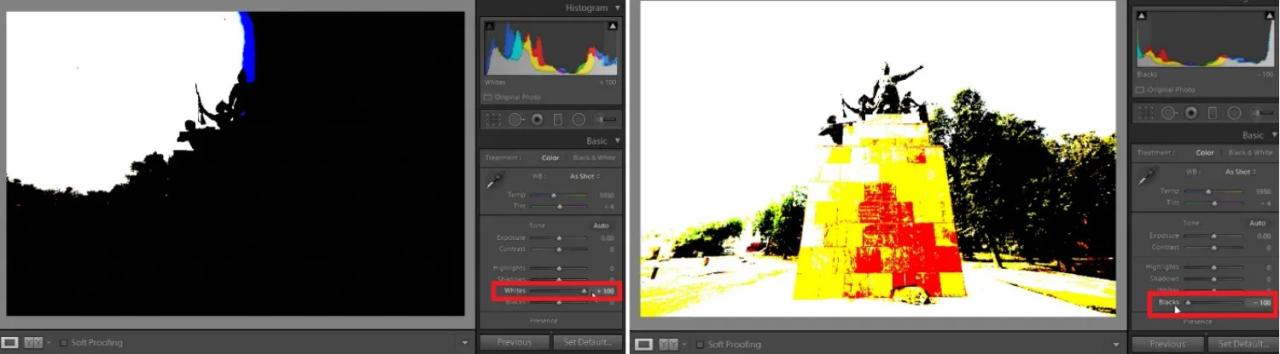
A mask that shows noclipping will appear all white or completely black. However, a mask that shows the clipping of a certain area will change color over the troublesome areas:
(Note that when adjusting to adjust the Blacks as well as the Shadows the clipping is shown by hue on the white. However when adjusting the Whites, the Exposure or the Highlights clipping is displayed in colored on dark black.)
As long as there’s no clipping issues, you’re good to start – but once you begin to notice a decrease in detail, it’s time to reduce the amount of editing. Does that make sense?
Another Lightroom tip: If would like to determine the source of clipping, but do notwant to spend a lot of time looking over the masks you could just click the arrows on in the middle of your histogram.
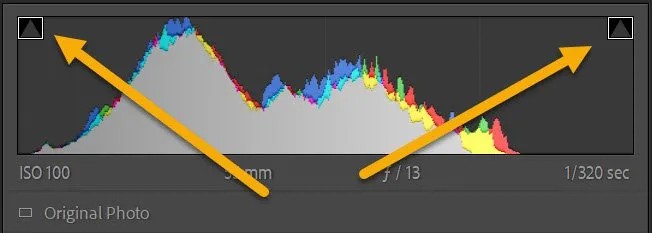
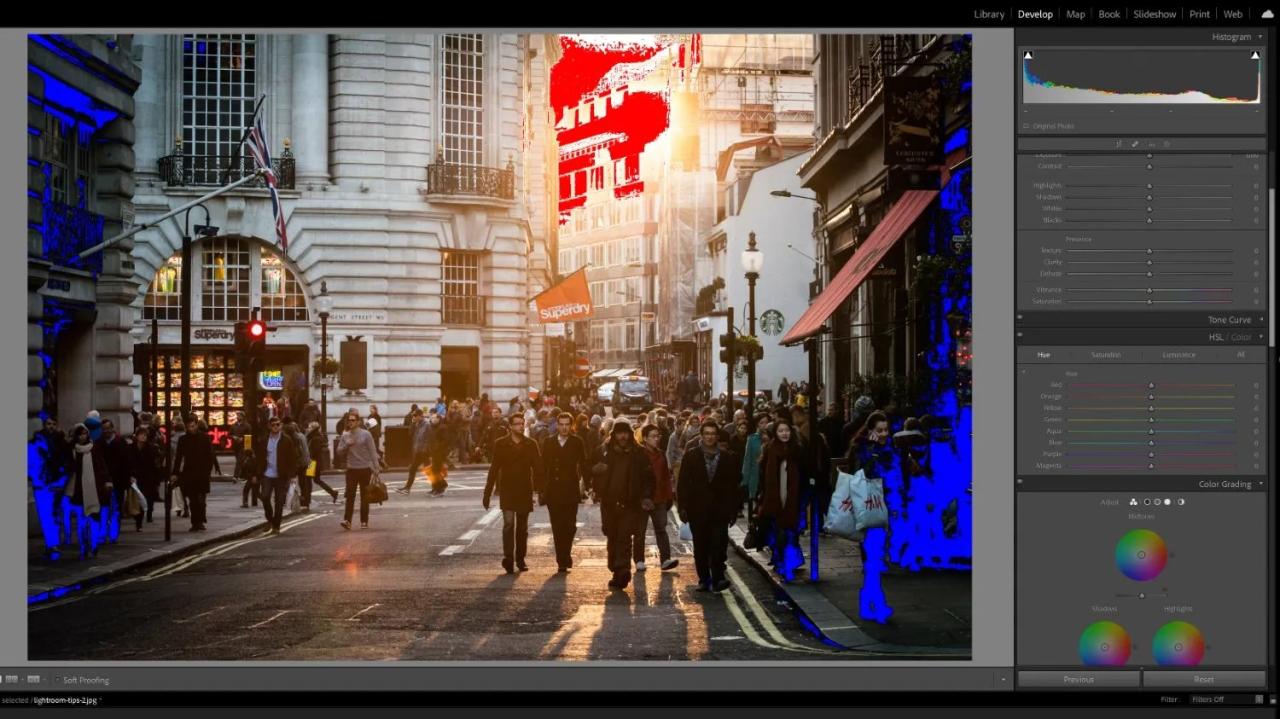
This activates clips indicators that will cause the shadows of clipped shadows to change blue, while highlights that were clipped change color to red:
4. Copy-paste shortcuts can be used to accelerate your process
Imagine you’re editing a huge number of images from a party, a wedding or shoot. You’ll have to sort through the photos quickly and you don’t want to edit each photo in isolation.
You can make presets however each requires time to create and, If the presets are based on photoshoots they may not be used again. them for another photoshoot.
If you’re not, then why don’t make use of the copy-paste option in Lightroom?
When editing an image you can choose Copy>Edit (or use Ctrl/Cmd+C). A pop-up window will appear asking you what settings you wish to copy:
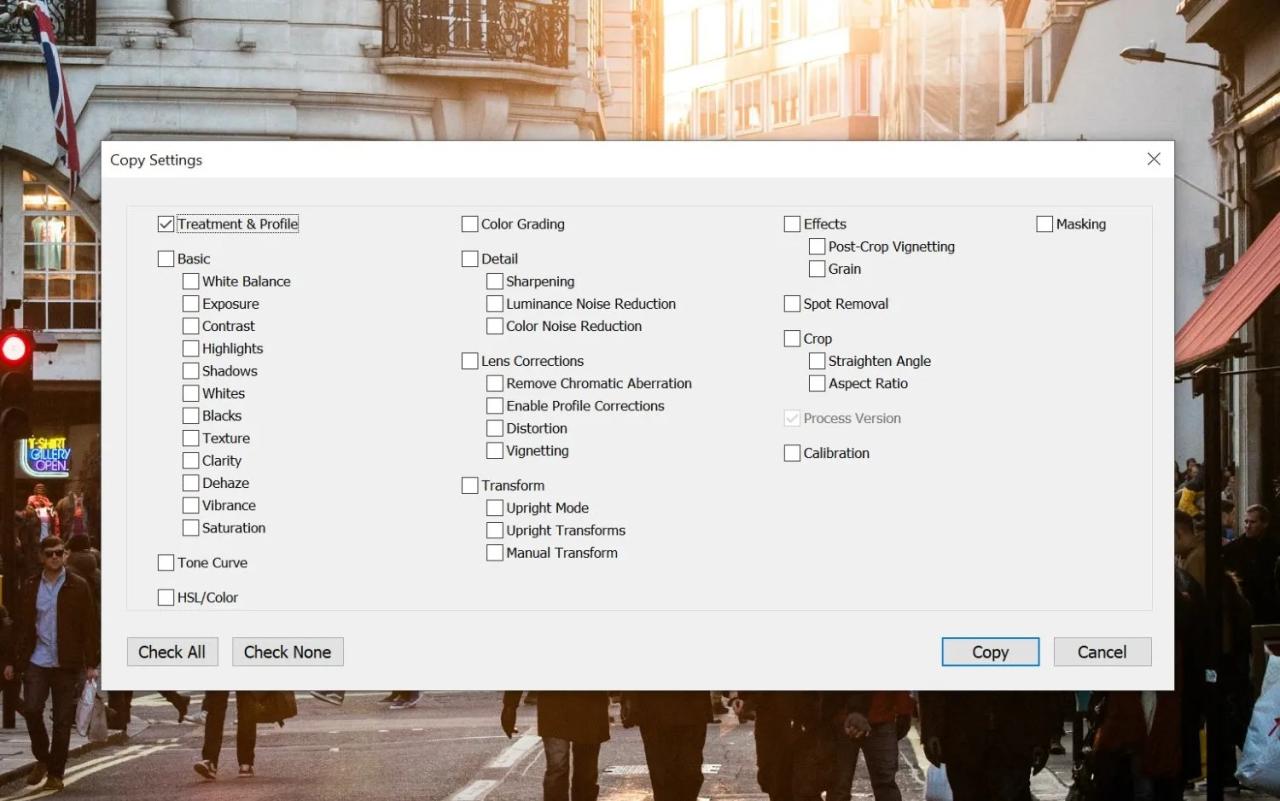
Once you’ve made the appropriate settings, choose the photos to be edited, then select Edit > Paste(or use Ctrl/Cmd+V).
The settings you have created in the original image will be pasted on the chosen images Your editing will be completed!
This is a fantastic option to deal with difficult photoshoots. For example, if took photos in a variety of light, you can modify one one that was frontlit and then copy the settings, then paste them over other front-lit images. It is possible to do the same with the backlit images the images with shade and so on and if you want more control over the results You can make minor adjustments to the settings you’ve made after which you can copy and paste the changes as needed.
I do have a suggestion I do have a suggestion, however:
Even if you believe you’ve accomplished a great copy-paste job, you should quickly review the edited images and ensure all is in order. It’s not ideal to email pictures to a customer but then discover that you’ve cropped the images by mistake!
5. Utilize Lightroom’s local adjustments tools
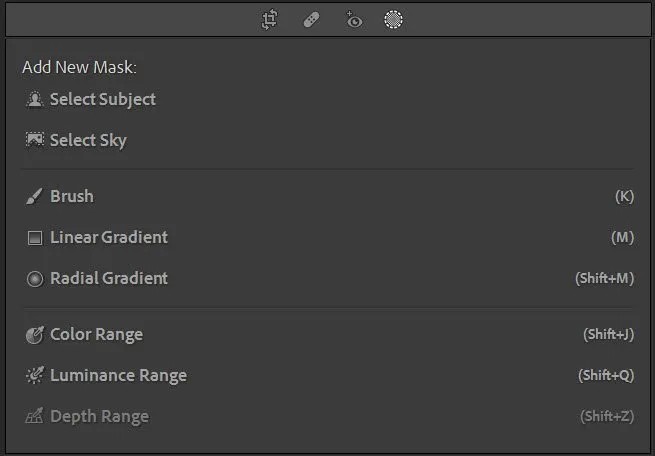
Lightroom provides a variety of local adjustment options, often also known as masking toolsthat are incredibly efficient. You will find them at the top of the editing panel under the histogram.
Contrary to global adjustments, which alter the entire image local adjustments can only affect a specific area of the image.only modify a small portion of a picture.
While you can brighten up the entire image by using exposure sliders, it is possible to also brighten up onlythe foreground by making local adjustments. While you can sharpen all of the image with the help of Lightroom’s Detail sliders and make sharp onlythe main subject by using local adjustments. These are a fantastic option to make fine-grained, refined edits that enhance depth, increase color and draw the focus to the object.
I love using local adjustments for a myriad of things However, here are some suggestions:
- Utilize the Radial Gradient to create an Vignette (i.e. or a darker result) on the outside of the frame
- Make use of a Radial Gradient increase the brightness of the subject
- Make use of the Linear Gradient to reduce the exposure while increasing the contrast of the sky
- Make use of the Linear Gradient to make the foreground darker
In reality, when you think about local adjustments, there is no limit to the limit. You are free to apply the tips I mentioned above, but make sure to experiment. So, you’ll have the full picture of how the tools for masking are used and what they could accomplish for your images!
Tips and tricks for using Lightroom Final words
There you are:
Five tricks to help you take the quality of your Lightroom editing skills to the next step.
Try these suggestions. Check them out and see how you feel about these suggestions. Let us know in the comments below how they go!