
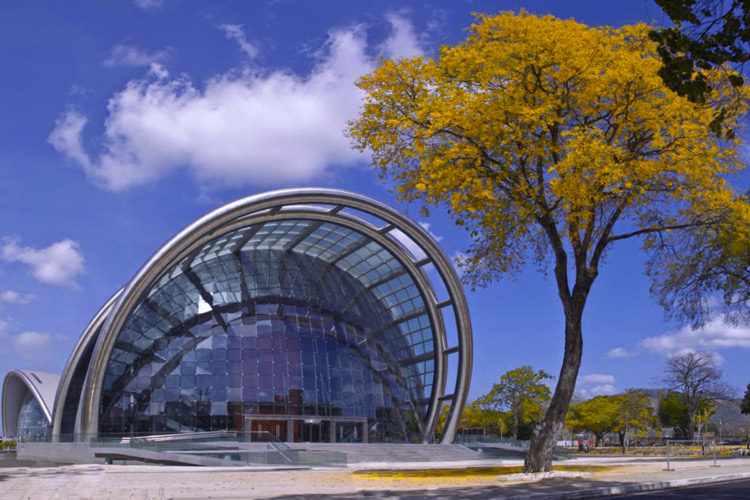
Architectural design is intriguing, gorgeous and an amazing photography subject. If you’re looking to get into architecture photography you’re in luck – are in for quite a surprise! You can make stunning photos that showcase a range of structures like modern towers, old cathedrals suburban houses and much more.
Of course, taking pictures of architecture is more involved than just finding an interesting subject and then snapping away with your camera. If you’re looking for great photos ones that get people to sit up and pay attention – you need be attentive to many aspects that include lighting, composition and the equipment you use.
This is what I will discuss the following article about: Four essential elements every novice photographer who is interested in architecture must consider along with how as a new photographer you can get going.
If you’re thinking about exploring the amazing architecture world, then let’s get started and begin with my very first suggestion:
1. Make sure you have the right gear
As with all genres of photography, you can to capture beautiful architectural shots with a simple point-and-shoot camera or even a smartphone however, the right equipment can make a difference. I suggest you purchase some high-end equipment prior to attempting any photography of architectural design.
Choose first, choose a DSLR (or mirrorless) camera that has an adequate number of pixels in case you need to print large (24 millimeters is a great starting base). The most effective cameras for photography architecture also have a stunning high dynamic range which means you can take bright windows as well as shadows of dark interiors in one frame and a full-frame camera that allows you to take advantage of the vast field of view provided with large-angle lens.
Image stabilization in the body and amazing high-ISO capabilities can be beneficial if you intend to shoot indoors and do not permit tripods.
It is also necessary to buy an additional lens or two. Wide-angle zooms are often an excellent purchase; here is the lens included in the kit camera has will work with you, or you can purchase a higher-quality lens for example, an F/4 24-70mm lens. Whatever you choose, ensure that your lens is able to provide a focal length of at least 30mm or greater. That allows you to make stunning compositions with many architectural details within the frame, regardless of whether you’re shooting indoors.

If you have a good wide-angle lens, you may think about buying one that can aid in capturing those details of architecture. A Kit zoom (such such as the 55-200mm model) is able to do an excellent job, but a 70-200mm lens with f/4 is more likely to provide more clarity and greater sharpness.
A zoom lens allows photographers to take pictures from further away and thus assist in minimizing distortion of the perspective (i.e. convergence of verticals).
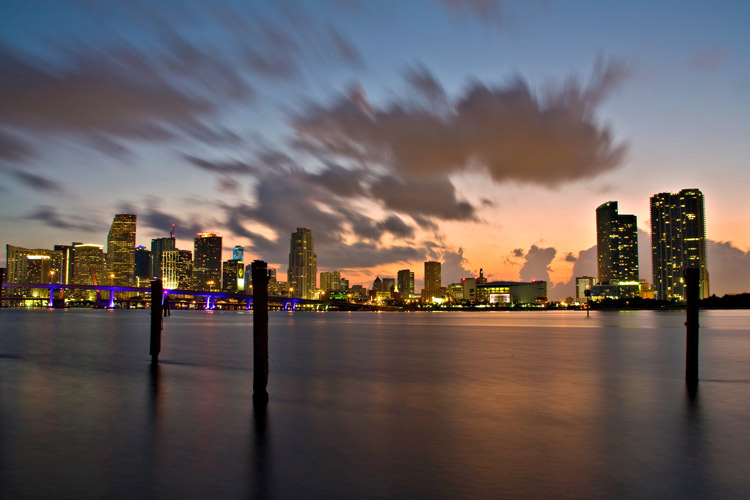
A last piece of architectural photography equipment tips Buy an tripod and make sure it’s a quality one. It’s true that you may not be able to operate tripods indoors however, if you’re photographing in areas in which a tripod is allowed it will allow you to increase the depth of field of your image and produce well-exposed images even in dark environments. It is also possible to utilize a tripod for experimentation with long-exposure photography and have an absolute blast!
2. Be sure to create your compositions
Composition refers to the arrangement of elements within the frame. For example, do you place a building into the centre of the image? Should you position it away towards the sides? These are crucial compositional questions and if you take the time to carefully construct the composition you will be able to drastically improve the quality of your photos.
Begin by studying the most popular compositional rules, like those based on the rule of three as well as the rule of odds. I also recommend looking into topics like negative spaces, positive space and minimalism..
After you’ve mastered the fundamentals, play around! Try practicing using three-point rule breaking it, and be sure to review the images you took afterward to determine which ones you prefer and what you don’t.
When taking photos of architecture, be aware of the camera’s angle relative to the object. If you are close enough to a building and then shoot upwards the structure, it could turn into a distorted image (though you could also apply this distortion effect to add dramatic effect; it’s all in the technique you choose to use! ).
Remember to take note of the angle you are using and the way it communicates the subject. Moving down below a building is dramatic, but moving up will allow you to illustrate the position of the building in a larger area.
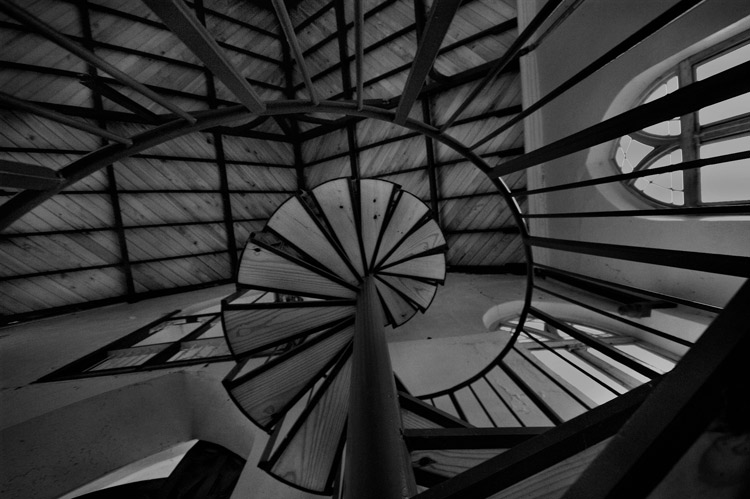
The most effective advice I can offer here is to try it out. If you spot a new structure that you want to photograph Try moving around and trying different angles. Shoot straight up, move closer or further away, lower to the ground If you are able take pictures from the top. You might get an undiscovered perspective that you’ve never seen before!
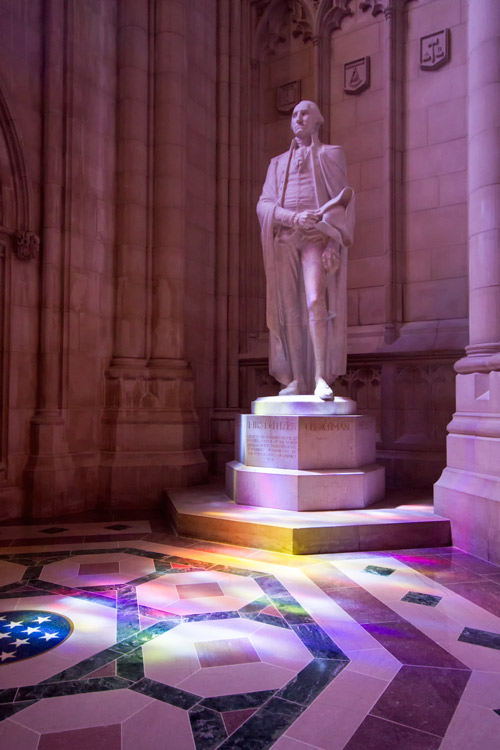
3. Pay your attention to the lights
Lighting can create lighting make a significantdifference in the quality of your architectural photographs. Unfortunately, you don’t have any control over the placement and orientation of your subject which means that you have to maximize the lighting available.
However, you could gain some control by analyzing the building you’re aiming to photograph, and then arranging your shoot so that it coincides with the lighting that you’re looking for. It’s important to think about two essential elements:
- Light quality
- Light direction
Light quality is a measure of the degree to which light is soft or hard and varies based on the moment of the day as well as the cloud cover. Cloudy days, and late afternoon and early evening tend to have soft light, while afternoons and mornings with sunshine offer hard light. Although it is possible to make use of any type of light, softer lighting is usually preferred if you’re looking to create stunning, painting-like architectural photos.
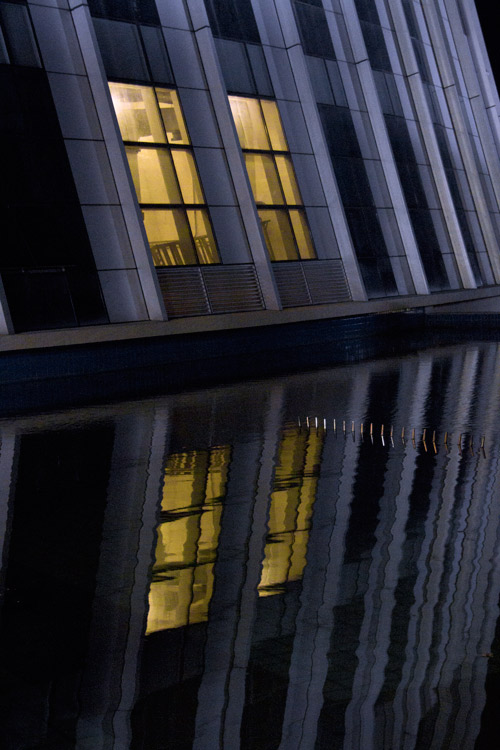
If the weather doesn’t cooperate, you could also shoot at the night. Many structures look fantastic in darkness thanks to the artificial lighting built in Make sure to make use of a tripod as well as an extended shutter!
The direction of lighting refers to the direction in which light travels in relation to your subject. By altering the direction of illumination, you are able to make sure that your images appear flat, 3D or something between. Of course, it isn’t possible to physically move a structure however, you can wait for sun to pass through the sky until get the angle of light you desire (or you could move around a structure in order to attain the angle you want).
The most fascinating (and suggested) lighting choices for building is side-front lighting. This is where light is reflected across the front and side of the façade. This can provide a good amount of light and can create interesting shadows over the facade of a building that creates a more 3D appearance.
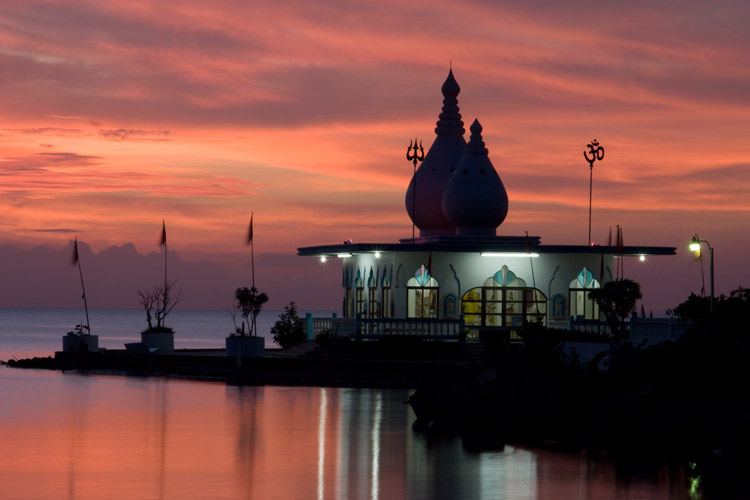
Beware of intense light sources while shooting building as it could result in uniform dark surfaces, unless you want to create an unflattering silhouette so to speak!
Find your spot at various time periods. Check out how lighting and shadows affect the feel and look of your photograph. Make sure you capture the perfect image! (Of course in the event that you don’t love the first result Try going back later or on a day that has different conditions, so don’t feel as if you must nail the lighting right from the beginning.)
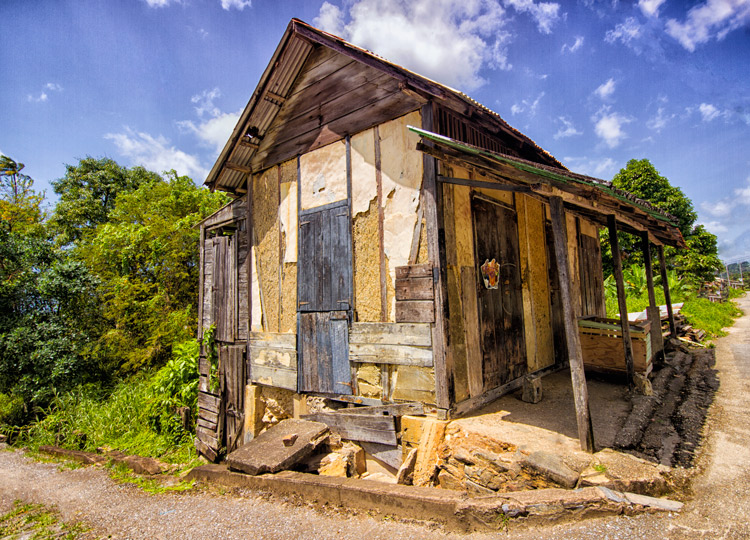
4. Learn about each structure
This may sound ridiculous it sounds, but if you invest time in learning about the structure you’re going to capture, you’ll end up with better outcomes.
When I say “get to be aware,” I mean that you must perform a couple of things. If you have the time, consider looking around the building and pay attention to the lighting. Consider how different hours of the day give different results. Look at the structure from all angles and contemplate how different combinations will produce different outcomes.
It is important to note that I’m not discussing doing scouting here. You are welcome to bring your camera and take photographs; the goal is to fully understand the insides and outsides of your structure so that you are able to maximize your outcomes.
Third, study images that were taken by photographers who are similar to your subject. Don’t duplicate these photos direct, but rather make use of them as inspiration. You can also use these photos to see the things that haven’tyet been attempted such as, for example for a structure that is usually shot from the front, consider shooting it from behind instead.
Learn about the past that surrounds your subject. It is possible that the past can influence your photography! For example If it transpires that a specific building has windows that are unusual You could then invest longer capturing them and end up with an unique portfolio that documents the most important characteristics of the structure.