

While it’s always advisable to avoid overexposure when out shooting, you can get the most out of overexposed images by combining editing magic:
Do you need to do some RAW processing?
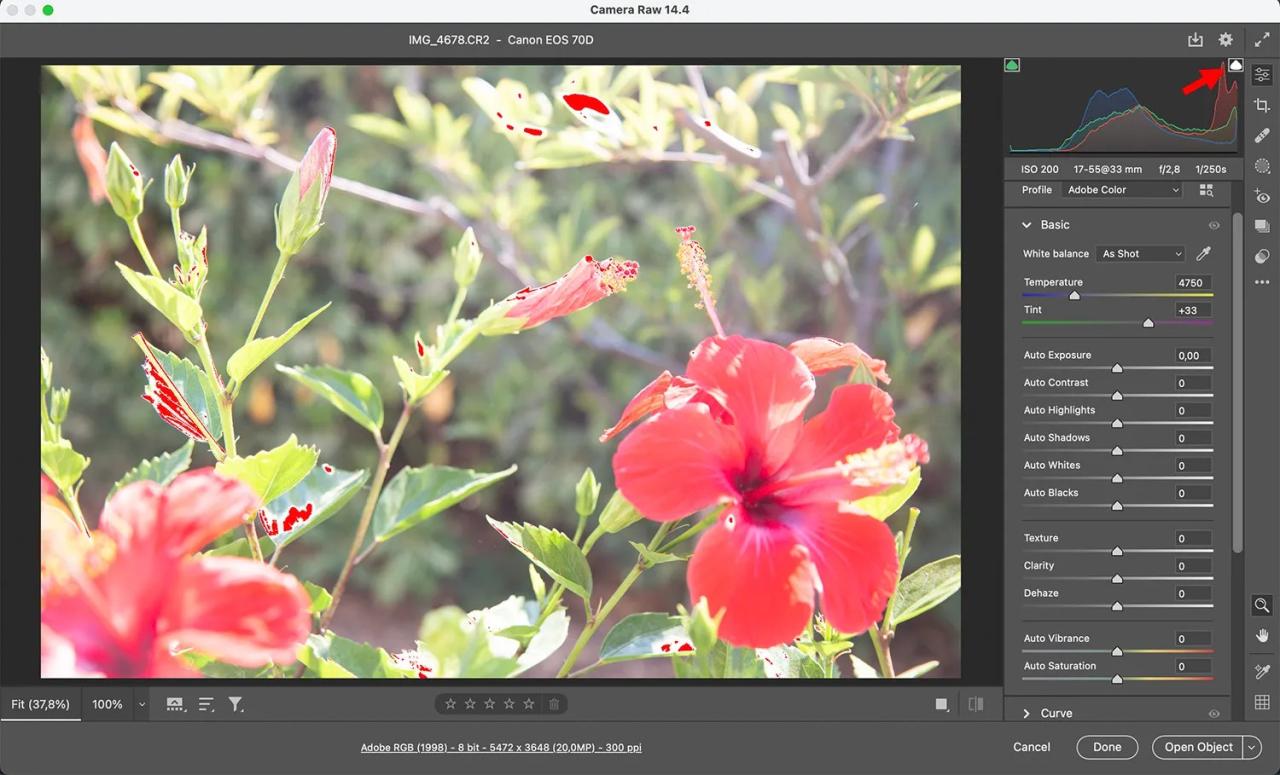
If you’ve exposed too much in a RAW image and you’ve overexposed it, you might be able to restore the majority (or most) the detail that was lost. Start by opening the RAW file using an image editor that supports it. I recommend repairing overexposure using Adobe Camera Raw, but the steps are identical in all applications.
You can activate the alert for clipping by pressing the upper right corner on the histogram. It will show areas of overexposure within the photo (i.e. areas that lack details and require correction). While you are making adjustments make sure you keep a close watch for the areas that have been clipped.
It is possible to start by removing your Exposure slider. The photo will be darker like it would if you shot the photo using higher shutter speeds or a smaller ISO or a narrower aperture.
Reduce the Whites slider that regulates the brightness in the whitest regions in the photo. Then, reduce to the Highlights slider till you’ve removed any clipping. (You may have to move in between Whites as well as your Highlights slider until you’ve found the ideal balance.)
After you’ve restored all the missing details, I’d recommend improving contrast by reducing the contrast by reducing the darker parts in the photo. You can accomplish this using your Black as well as the Shadow sliders. It’s beneficial to turn on the alert for shadow clipping (on the left-hand side in the histogram). This way, you will be able to immediately see if you have made a mistake and cause the image to be too dark.
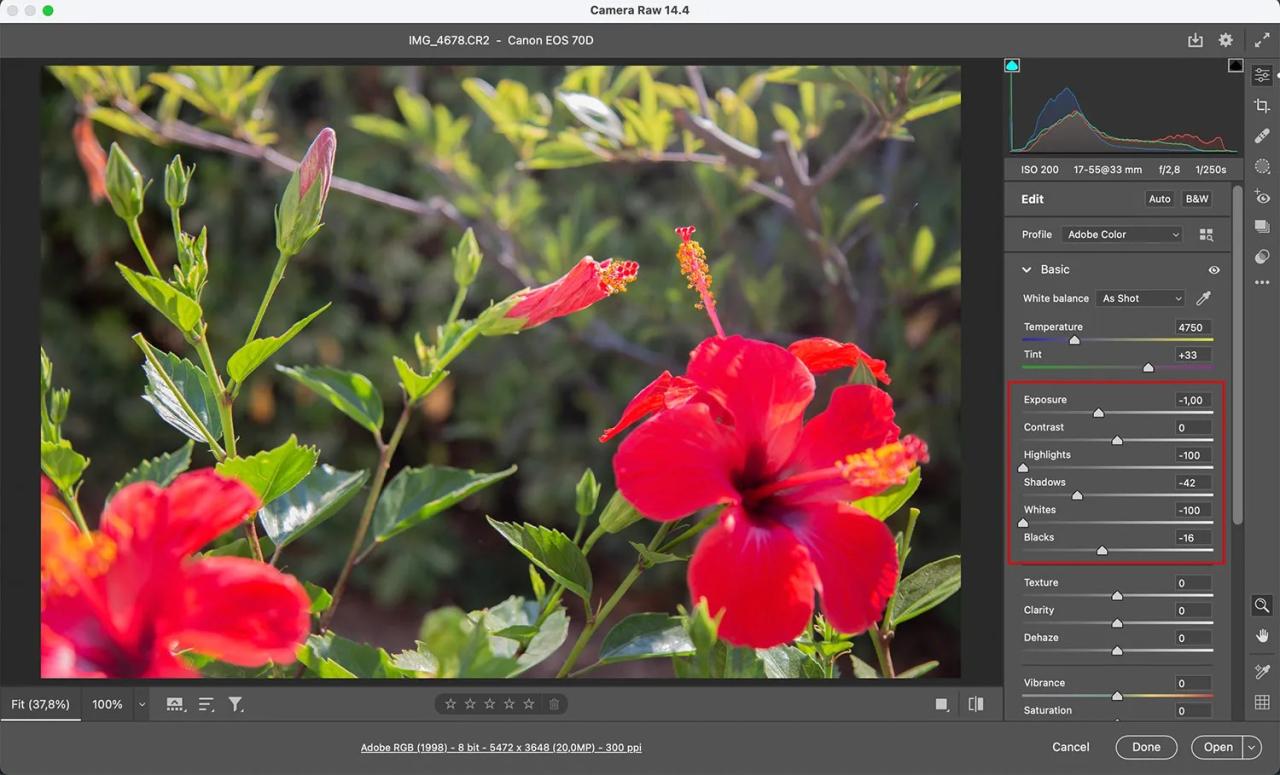
If your photo appears to be notlooking like it’s been washed Try using the Dehaze slider. This can darken the photo and add lots of contrast.
Mix modes can be used to create different blends.

Open the file within Photoshop (or an alternative layer-based editing software). Make a copy of the background. Change to change the mix mode to one of the darkening settings available in the menu that includes Darken, Multiply Color Burn, Linear Burn as well as Darker Color.
Different photographs benefit from different blended modes. Therefore, be sure to try all of them. In the case of Photoshop CC, you’ll see the live preview whenever you hover over each of the modes that is extremely useful. If you end up with results that feel too bright, you could reduce the transparency.
Try adjusting the level
Photoshop provides a simple adjustment called Levels that allow users to adjust their tones of your images.
Create an adjustment layer for Levels, that lets you alter the tone of your photo without causing any damage. There will be a histogram. grasp the dark slider on the left side and move it towards the right until it reaches the initial peaks in the graph. Try moving the middle slider towards the right (thereby increasing the darkness of the image’s midtones).

On the gradient stripe that is below the histogram, pull out the slider to the right. Move towards the left and then watch the brightest areas of your image become gradually darker.
(If you’d like a faster method, just hit the Autobutton and let the Levels adjustment layer take care of the adjustments on its own. You can always tweak your results later.)
Try adjusting your Curves
Curves is a different Photoshop tool that is designed to alter the tones of images. In fact it gives you greater control over levels, but it’s a bit more difficult to make use of.
Create an adjustment layer for Curves, then use your black eyedropper, and select the most dark tone in your image.
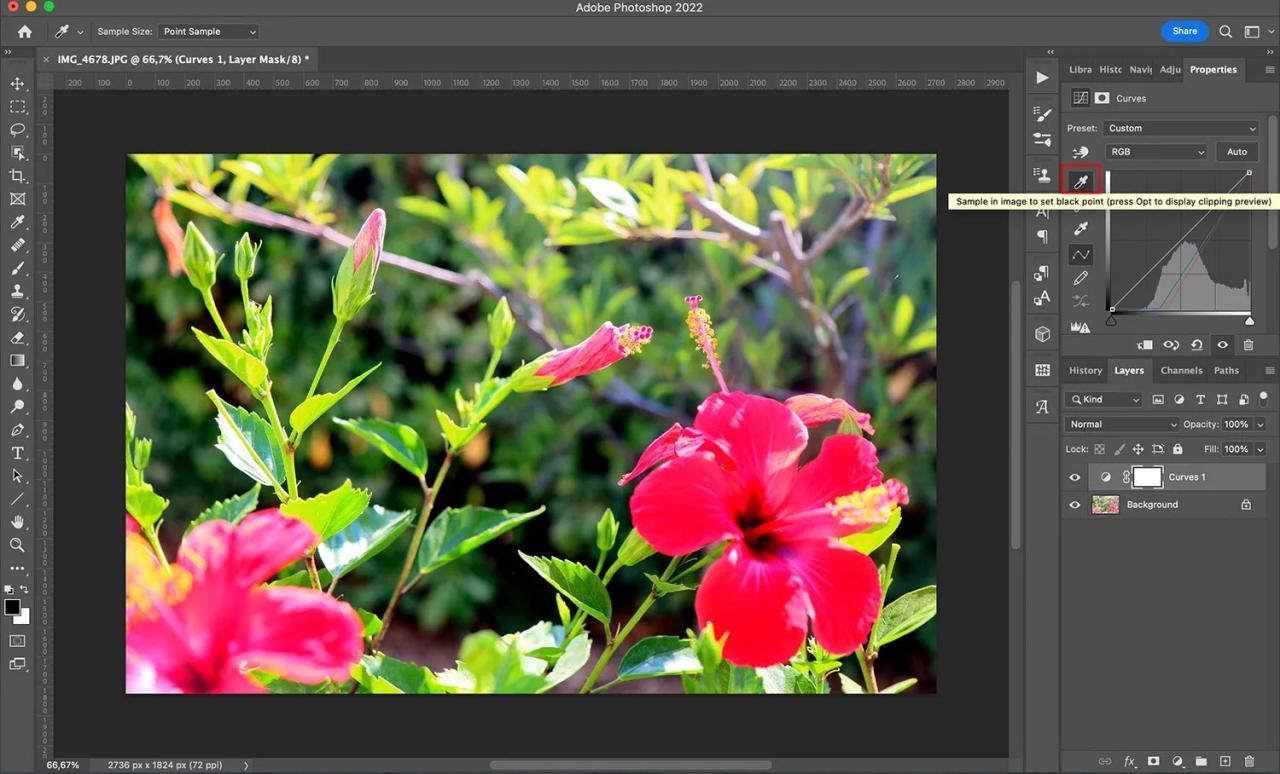
It will instantly darken the image. If you’d like to add handles on the Curves graph and drag them around to manually alter the curve. You can also select the Auto button then let the editor program make its own choices!
How do you fix an overexposed photograph: last words
As you will observe, there are numerous options to correct an overexposed photograph! It is always best to recognize the issue when you’re out in the field. That allows you to correct the exposure right from the beginning.
As you should be aware of, it is possible to modify the exposure and restore missing details in post-processing. However, this technique has its limitations however, and a RAW format offers far more freedom than JPEG. JPEG.
Keep in mind the techniques I’ve discussed. Also, take the necessary steps to avoid (or repair) any future exposure issues!
Which one of these strategies do you intend to use? Do you have other suggestions for dealing with excessive exposure? Comment below with your ideas. comments below!