
Did you have any idea the fact that Photoshop comes with Grids as well as guidelines? If you’re focusing on your lines each when you’re making corrections to a building’s viewpoint, straightening a the horizon or even putting an image with a logo Photoshop’s grids or guidelines could create an massivedifference. (And this isn’t even thinking about all the things you can accomplish with the tools when you design flyers or other designs.)
In this article, I provide an overview of Photoshop’s tools for positioning. I will explain the meaning behind what guides and grids are and how to make them. I’ll also give some tricks and tips to get always great results.
Let’s get started beginning with the fundamentals:
What’s a grid? Photoshop?
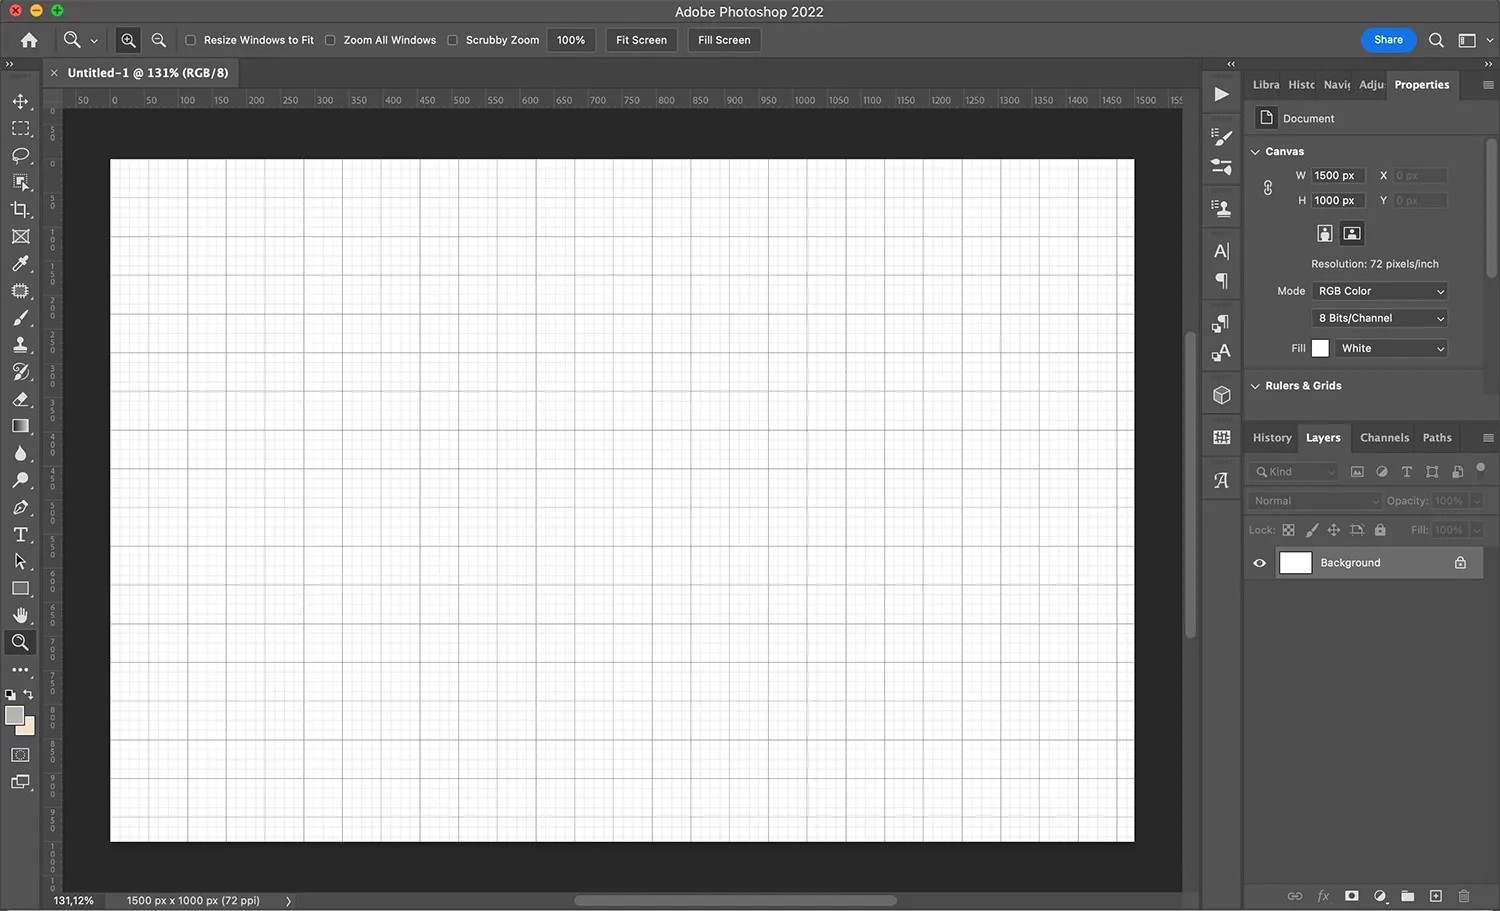
The term “grid” refers to a set of vertical and horizontal lines that cover Photoshop’s canvas as follows:
Grids are created to help users to find specific locations on your screen. Grids can be used for creating symmetrical patterns or arrange multiple elements, among other things. It’s important to remember it’s only an aid to visualizing in Photoshop The gridlines aren’t printed or saved onto the photo.
What are the guides available in Photoshop?
Guides are lines that you can draw on your Photoshop canvas:
Guides are used to make designs to straighten elements, manage spacing, and more. They could be vertical or horizontal lines. Like grids, they’re just visual aids in Photoshop When you save your photo without first removing the guides, they won’t show up in the final image.
How do you make a grid using Photoshop
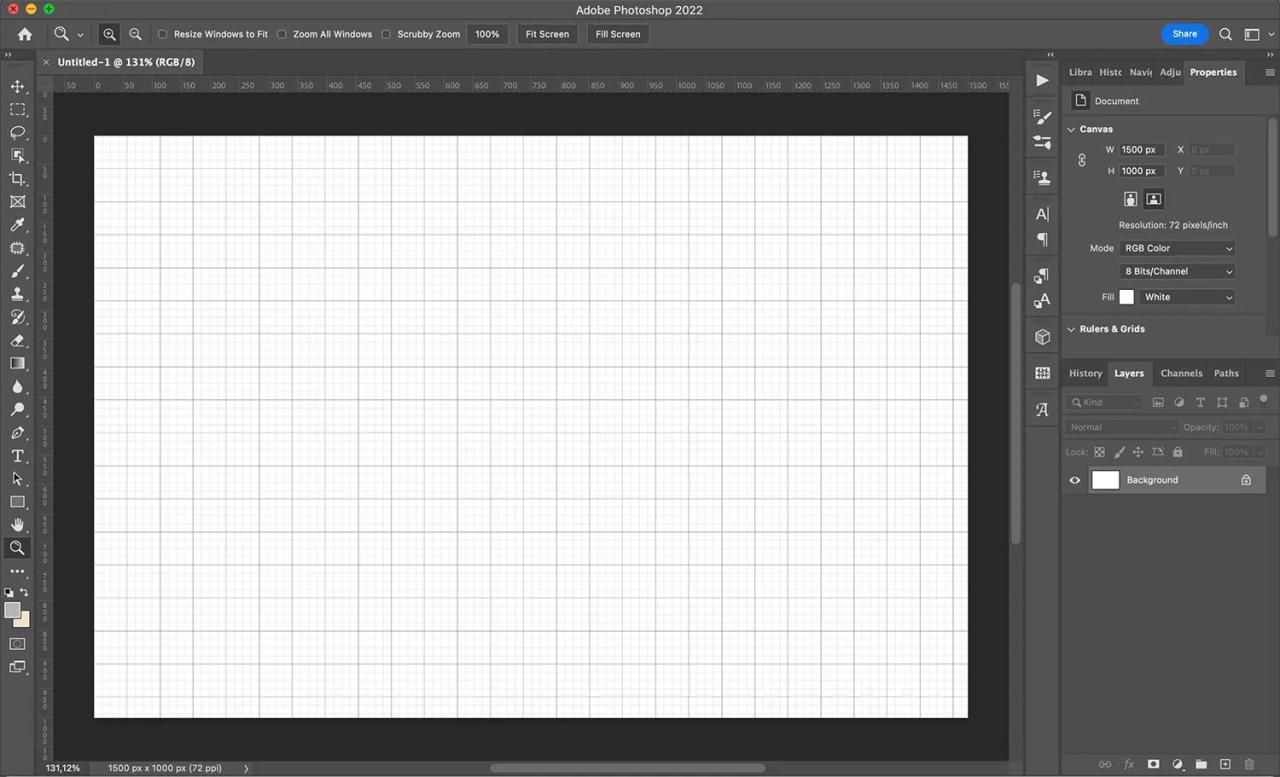
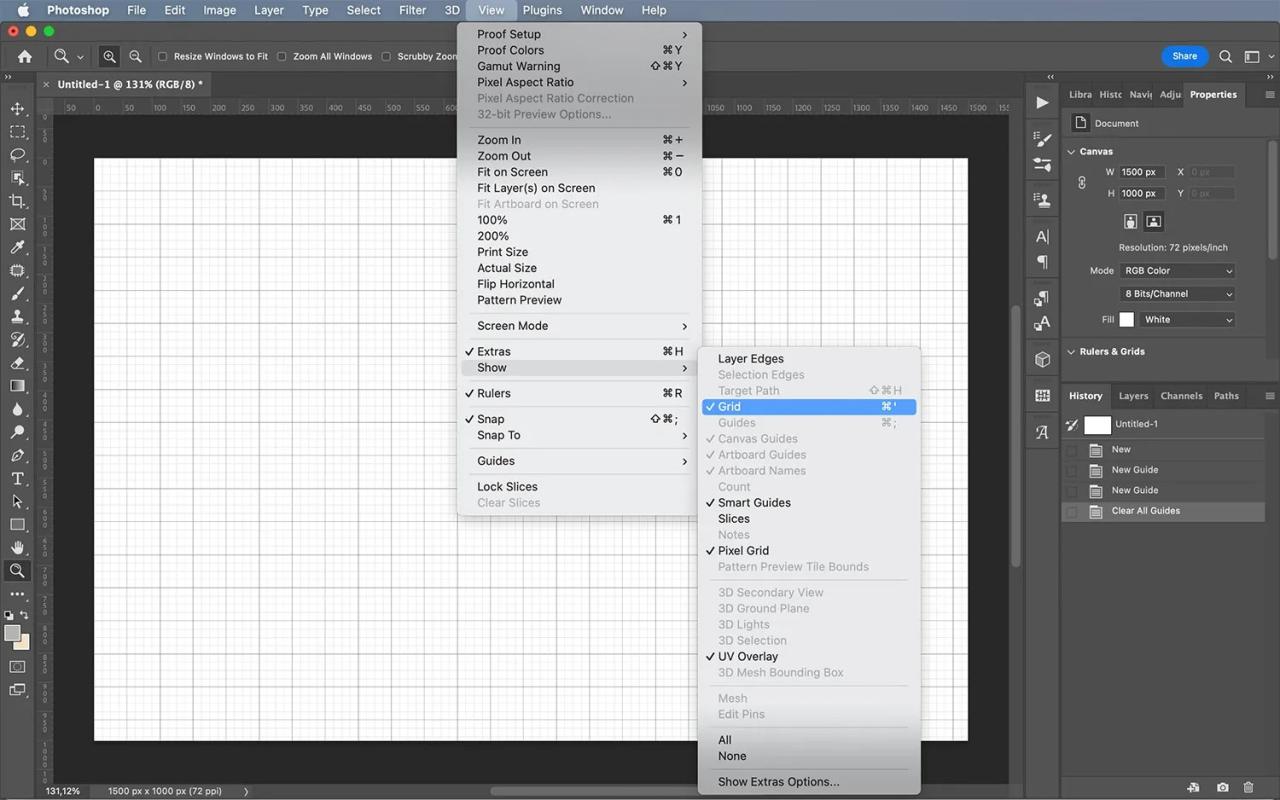
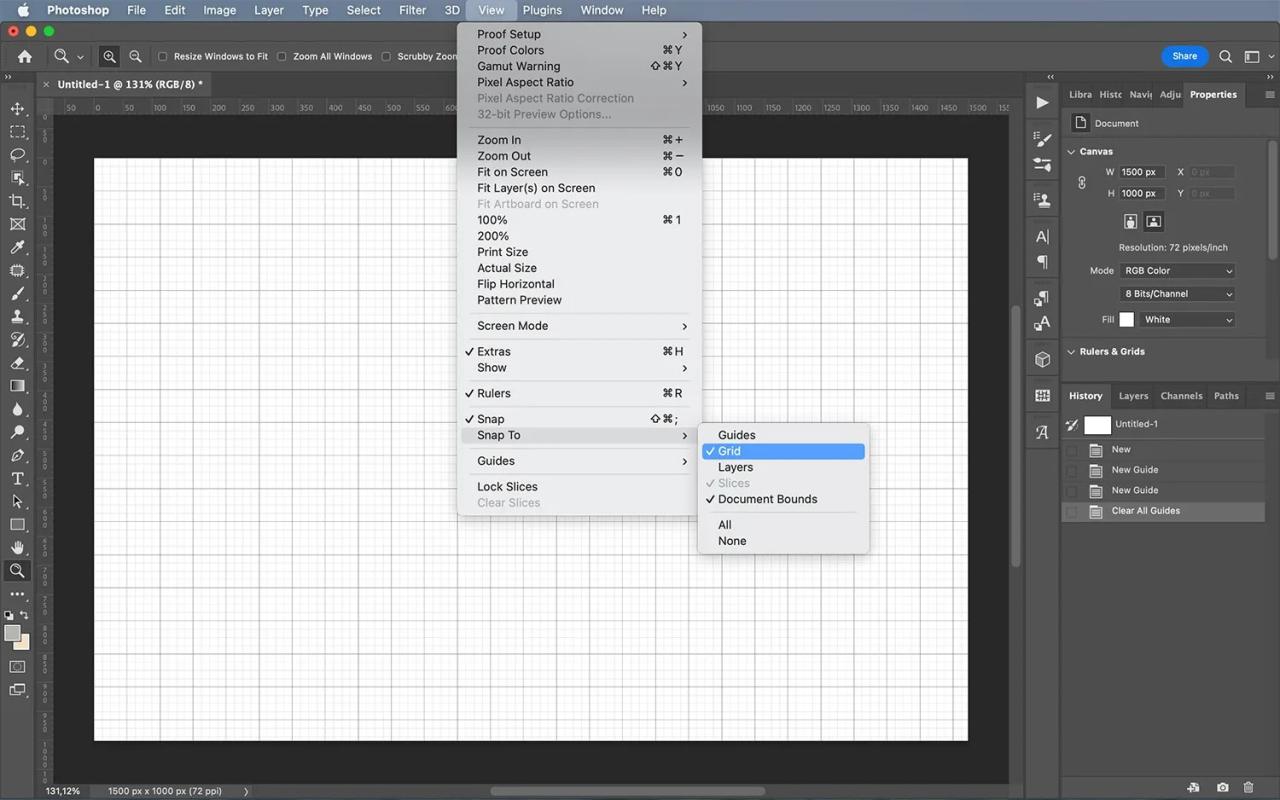
Making a grid is simple. Just go to the Photoshop menu, and then select View > Show>Grid. Check out the image and you’ll see the lines that cross the page.
(Note If grids have been enabled by selecting View>Show then you’ll notice an asterisk next to Grid. gridoption. If you’re unsure whether grids have been enabled you can simply visit the View menu and select Showand look for the checkmark!)
Photoshop’s grid is transparent horizontal lines that appear like graphing papers students use in math classes. In default, grey gridlines appear every two centimeter, and have four subdivided areas:
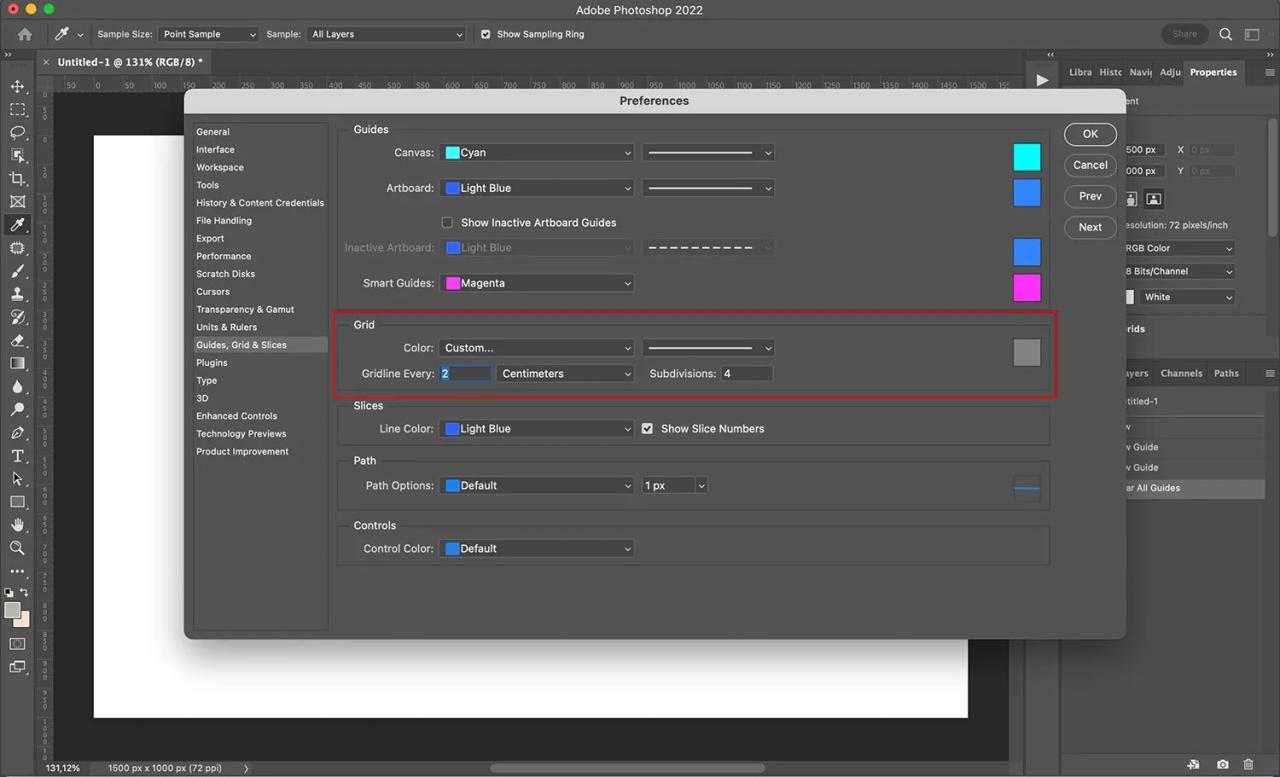
However, these settings may be changed. You can actually create as many or many gridlines as you like! Simply go to Photoshop>Preferences>Guides, Grid & Slices. There, you will be able to change the color of gridlines, the kind of gridlines, and the spacing between gridlines and the amount of subdivisions.
Grids can serve as an aid in visualizing how to manually arrange elements on the canvas. However, it’s also a fantastic method to align components by snapping them. The reason is that Photoshop grids come with the ability to snap them together using a snapfeature. You just need to select View>Snap to Grid. When you drag an element across the canvas, it’ll be aligned with the gridline closest!
It’s vital to keep in mind that: The grid won’t print. It’s a visual aid and you don’t have to think about turning it off at the conclusion of your project. (But it’s helpful to view the final product without a grid. In this means you are able to precisely evaluate the final product.)
To deactivate the grid, just select Display>View>Grid. The grid that you are currently using will disappear. If you go back to the menu grid will not be checked.
How do I create a guide with Photoshop
As I mentioned earlier guidelines are lines are added create manuallyadd onto your Photoshop canvas. You may choose to cover your entire canvas with guides, however you could also make only one guide. That is you can develop guides on a regular basis.
(Of Of course you could always design at leasta grid as well as a couple of guides. You can even utilize a grid to help place your guides! Be aware that guides, unlike grids, aren’t printed.)
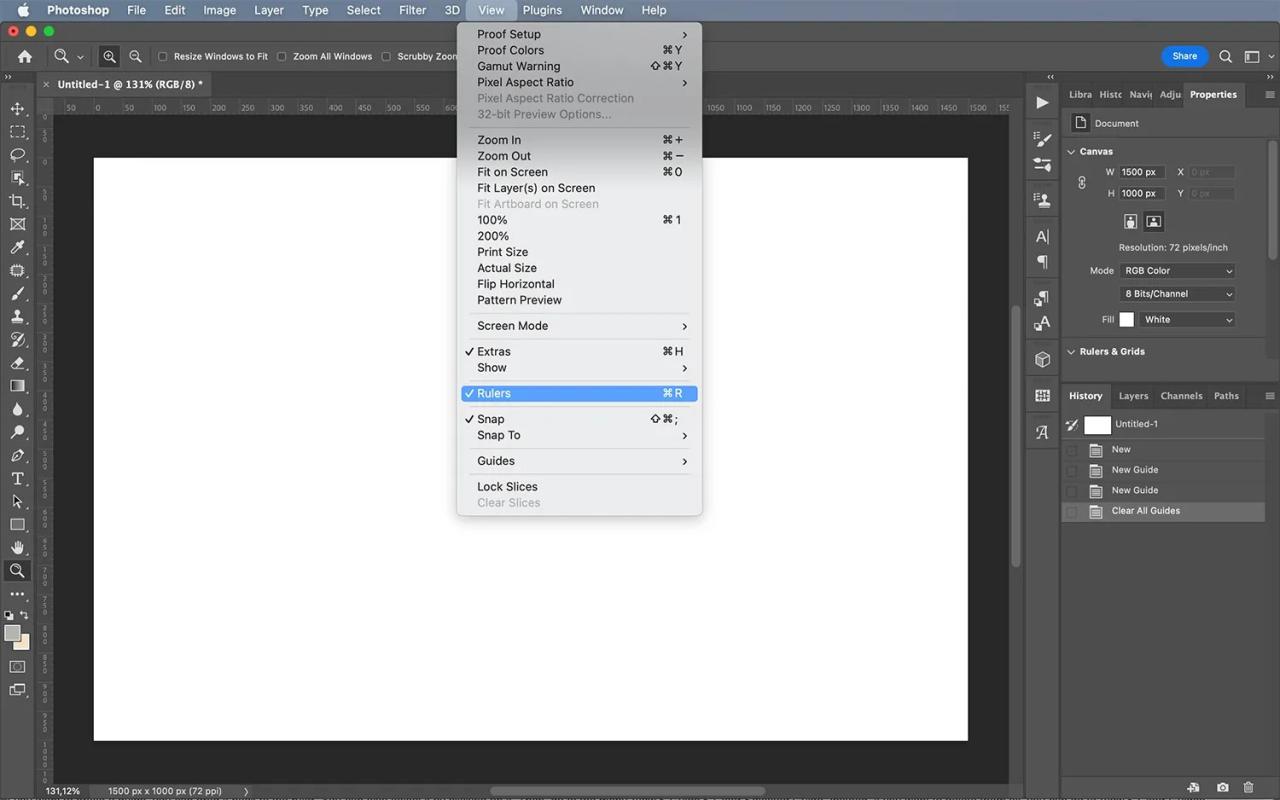
To create a guideline it is necessary to be able to use the rulers So, go ahead and choose view >rulers. (You can also make use of your keyboard to type to Ctrl/Cmd+R).
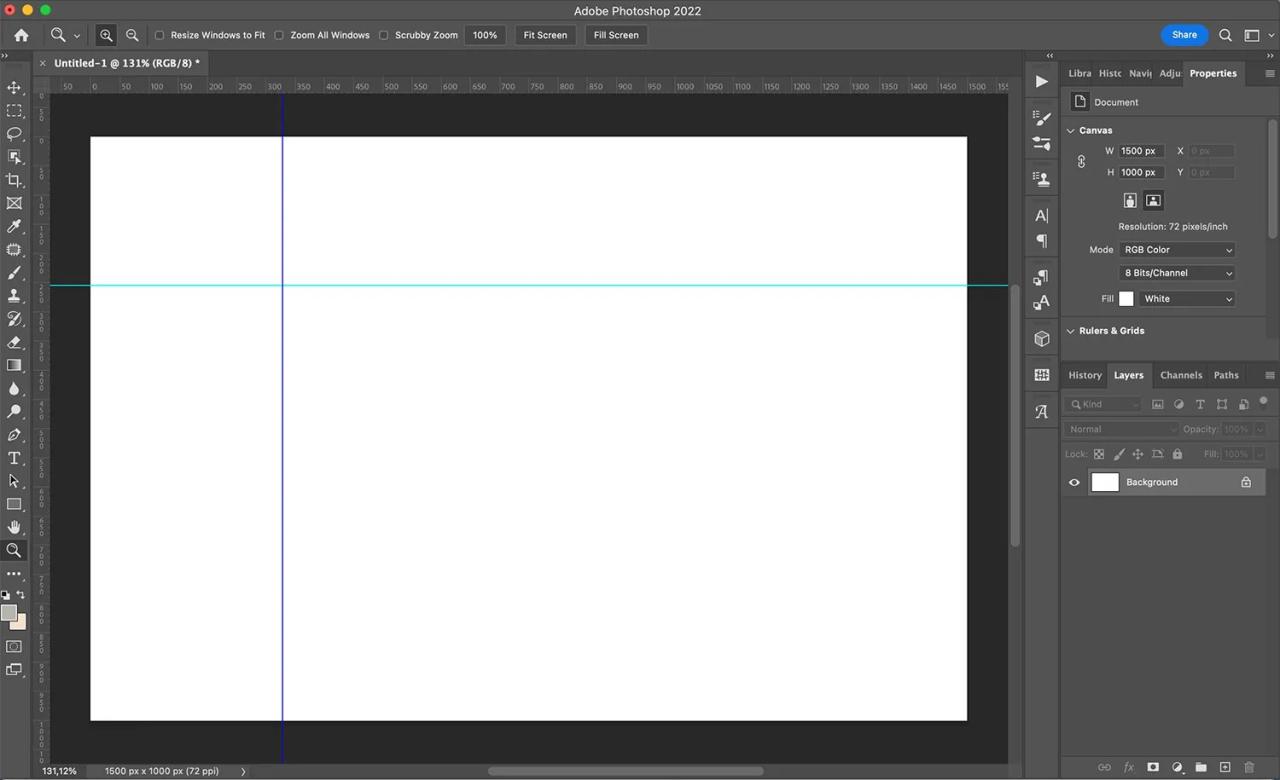
After you’ve completed this and you’ll be able to see a ruler on the left side and one at the top of the canvas. For creating a horizontal guideline, drag and click on the top ruler. To create a vertical guideline, drag and click from your left-hand ruler.
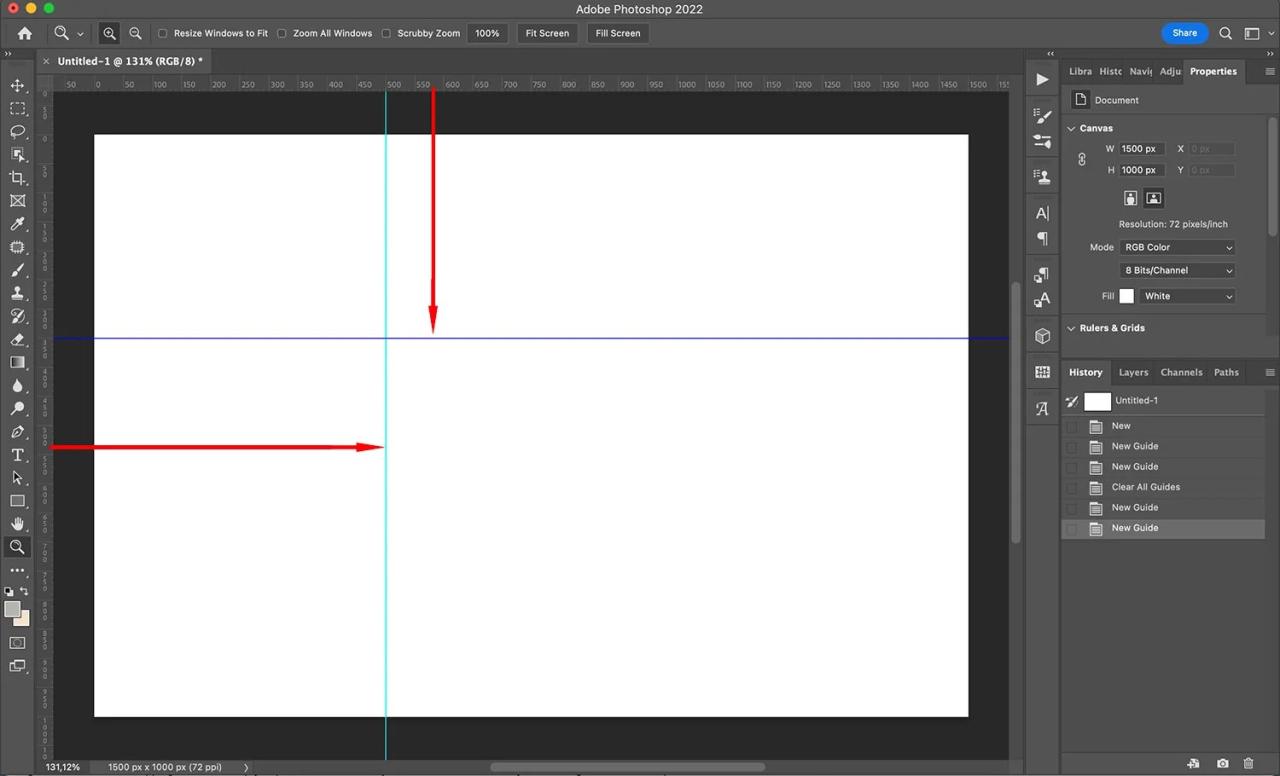
Move your guide to the desired the desired position, and then release from the keyboard. Your guide is there and you’ll be able to continue in your work (or you could decide to make additional guides). If you lose the guide or would like to move it later use the Move tool on the toolbar. You can then you can hover over the guide until you can see the cursor transform into two lines with arrows. Drag and click to transfer the guide into a new location.
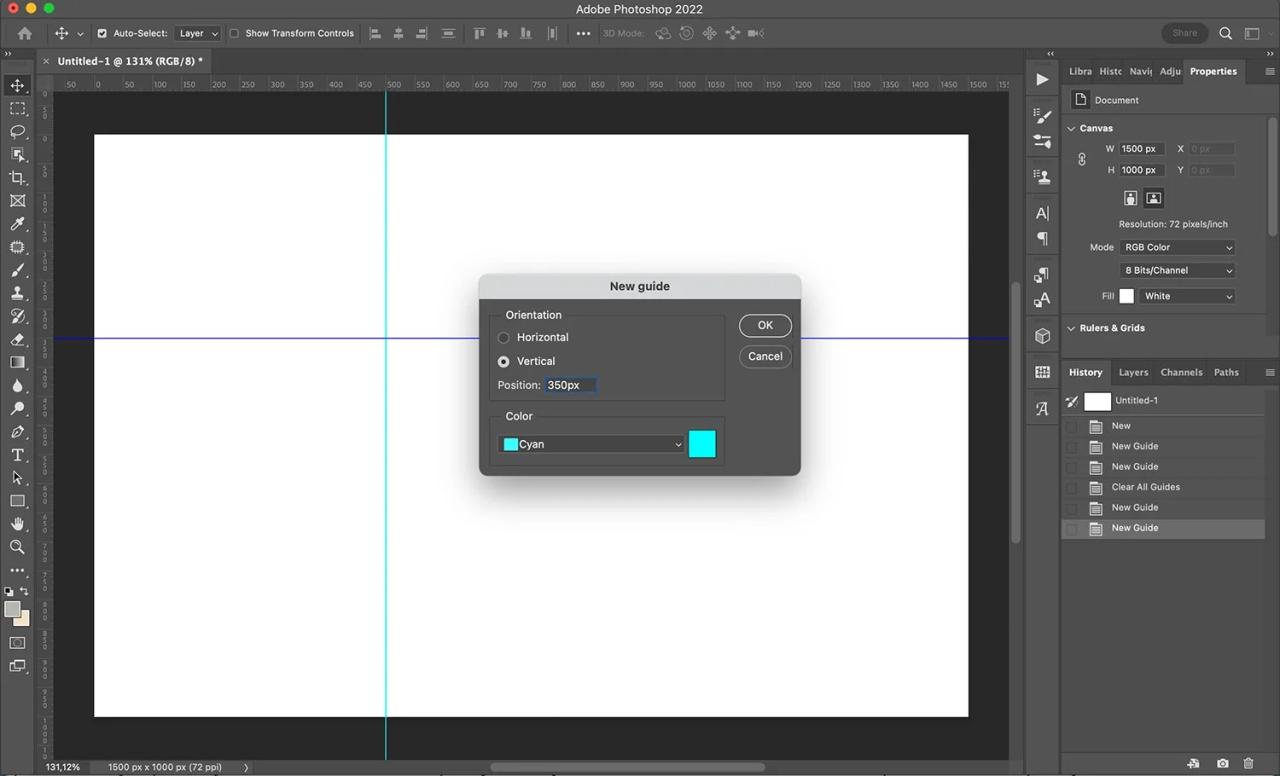
You can also create a new guide which is displayed direct on the Photoshop canvas. Choose view>guide>new Guide to display a dialog box. Within it, you are able to alter the line’s orientation, location, and color.
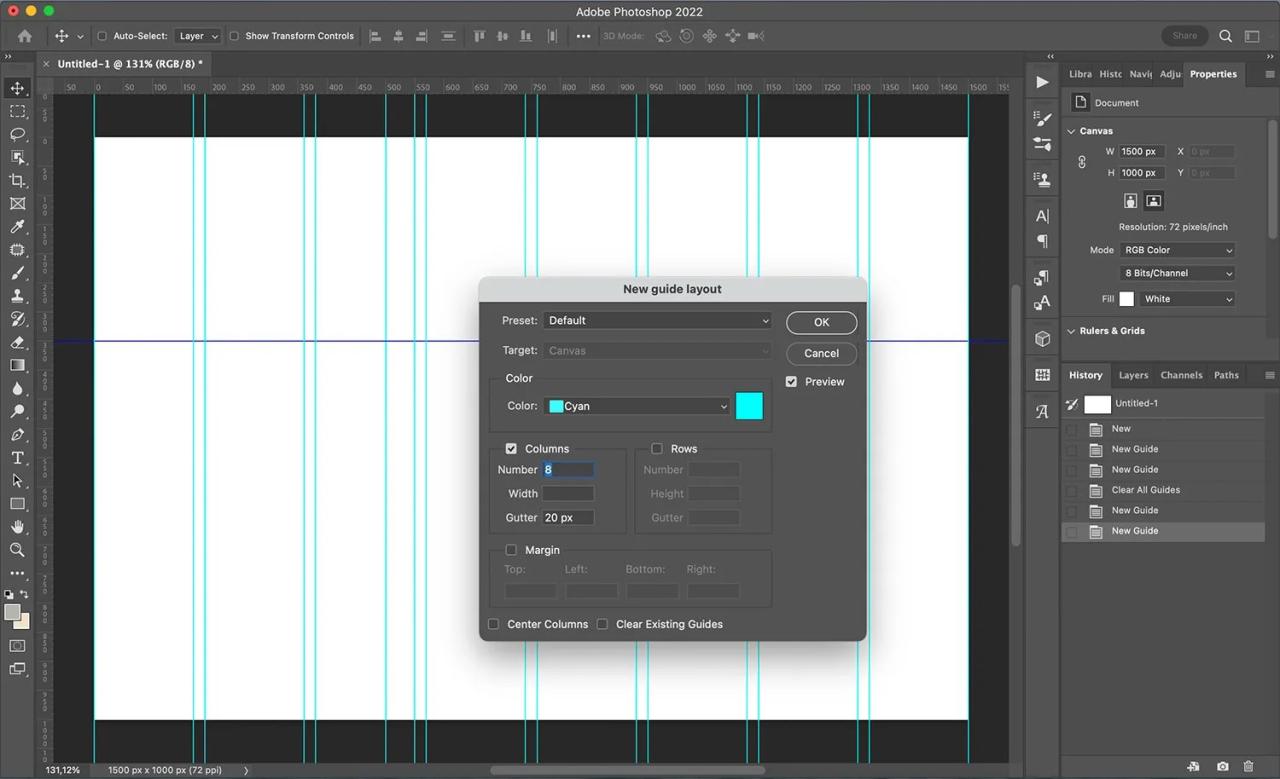
Guides can be used to design an individual grid. Go to View>Guide>New Layout. A pop-up dialogue box will open, in which you can input the number of rows and columns you’d like to make. You can also alter the dimensions, gutter and margin. The best part about this feature is the ability to save every newly created layout in a template and use it in subsequent documents.
Note: Because you can move guides using the Move tool that you can use to move other objects they could be moved by mistake. To avoid this, you must ensure you secure your guides to prevent them from moving. Create all the guides you’ll need and then go to the View tab, then Guides > Lock guides..
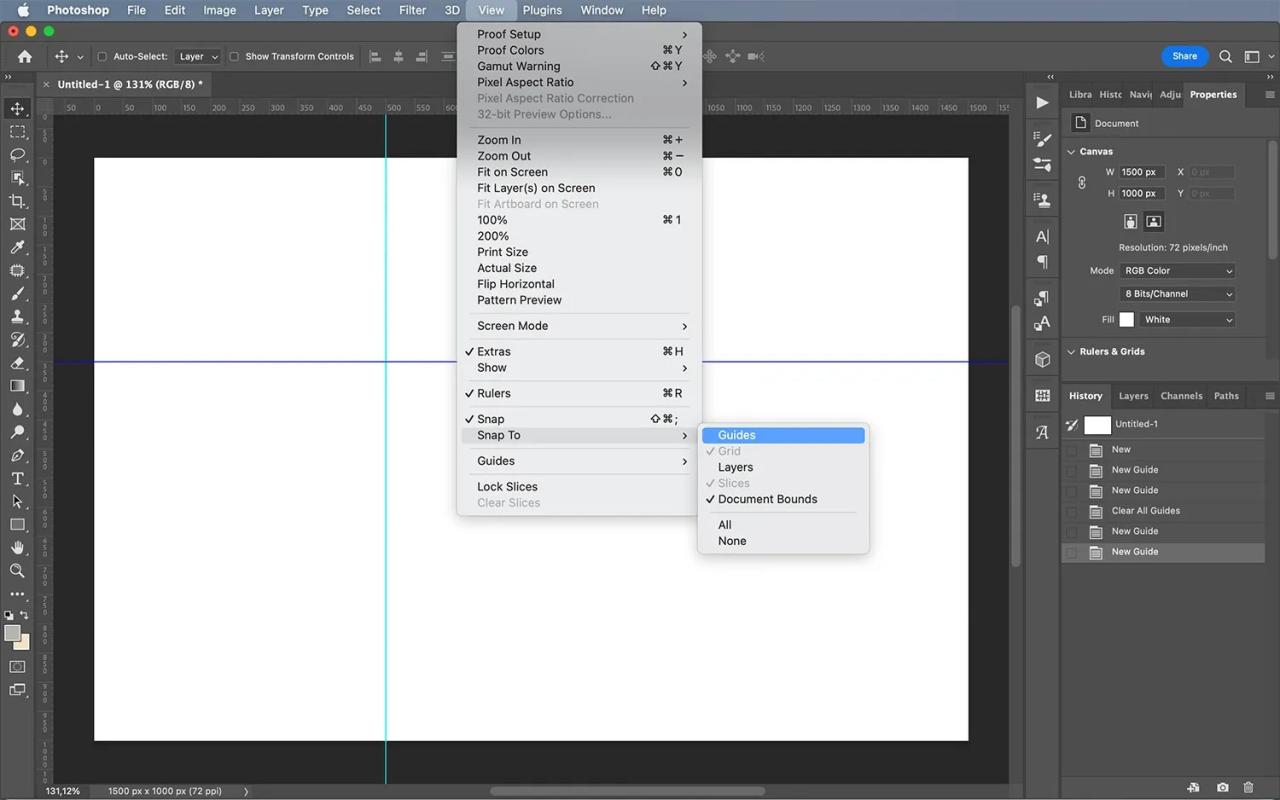
The guides also feature the snapping feature that allows you to precisely place parts of the canvas. It can be activated by clicking View > Snap to Guides.
If you want erase a guide simply bring it right back up to the ruler. You can also click on the guide and then select the View tab, then Guide > Clear Selected Guide. If you wish to erase eachguide then choose the View tab and select Clear Guides.
Create guides and grids using Photoshop Final words
Photoshop isn’t an exclusive graphic design software However, Photoshop doeshave several tools for designing that can help you improve your workflow. These include Grids, guides and grids!
Additionally, guides and grids can be used for more than just graphic design. You can also make use of them to help you to scale images, make photo composites and ensure proper perspective and much more.
Practice creating grids. Enjoy using instructions. Check out the results you can make!
Let me now tell you:
What do you think about how to make use of grids and guides for your design or photo editing? Let us know your thoughts in the comments below!