


Recently, a reader Rod Sawyer wrote to us for assistance: He’d noticed music videos and commercials where a subject is clearly in focus, but is covered by a region of blur. He was curious about how this could be achieved. The effect he liked was how that it helps the object stand out, and to create the dramatic impression of depth. It’s not difficult to achieve this look, particularly when you’re using Adobe Photoshop, and so long as you decide to create the correct type of image. To give impressions of depth it is necessary to have a picture that is clear in the background, foreground and middleground background. Test the effect on a flat image and the blur will appear like a bizarre Photoshop trick, not an almost realistic one.
Although this type of highly specific blur isn’t something you can achieve with a standard lens or a tilt-shift lens, it can be fun to make use of Photoshop to create a sort of photo that’s difficult to capture with the camera.
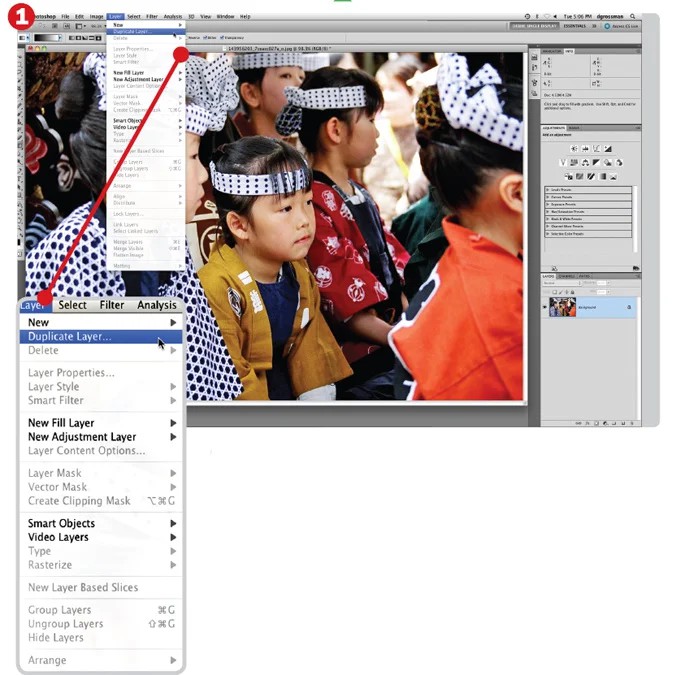
Step 1
This method of blurring utilizes two layers: one layer that is the first sharp image at the bottom, and an additional layer over which you’ll blur completely. In order to create the layer will be blurred make a duplicate of your Background Layer. Click layer > duplicate layers, and click OK. Or, simply Drag the Background Layer onto the New Layer tab in the Layers panel.
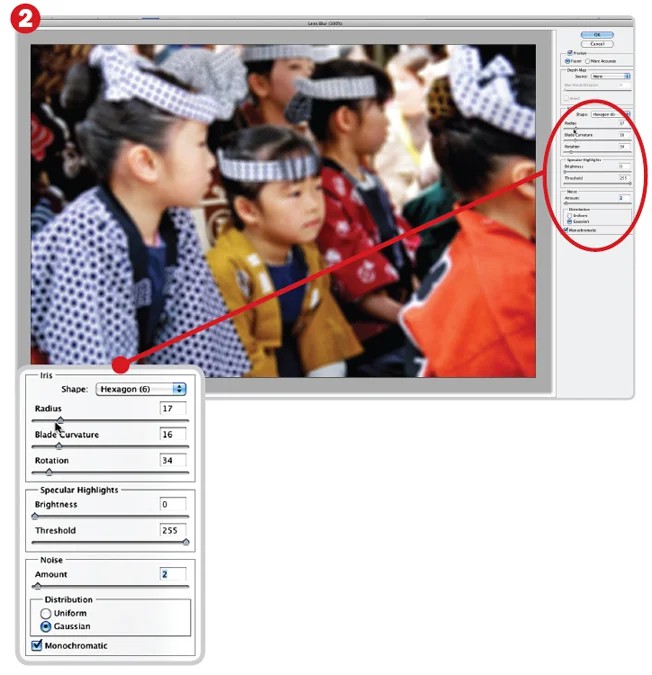
Step 2
Create the blur. When you’ve got you background Copy layer selected, click the Filter menu, then Blur and Lens. Utilize your Radius slider to change the amount of blur and then play around by using other sliders until have an appearance you like. It should appear clear but not so strong that it obscures what’s happening within the areas that are blurred. If you are satisfied with the image then click OK.

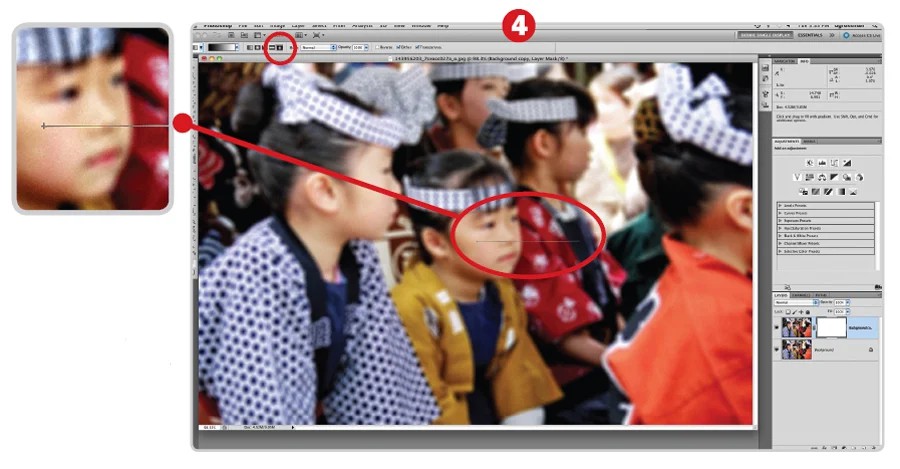
Step 3.
When you’ve got a blurry layer over the top of a clear layers, create masks to show some of the clarity. Select the Background copy then click to click the Add Layer Mask button (circled). That white rectangle that is displayed beside the thumbnail of your layer is your mask. When you click on it and you see an additional box surrounding it you’ve selected it.
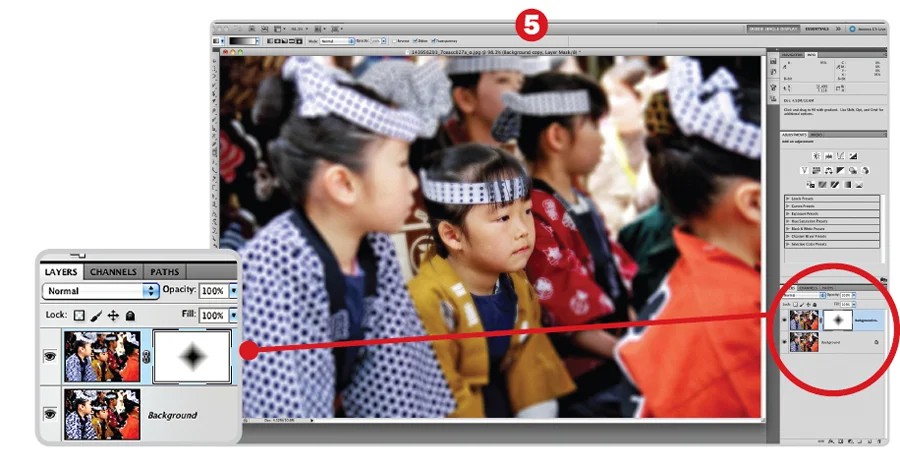
Step 4
Then, you can access using the gradient tool in the toolbar. Within the options bar there’s the buttons for different kinds of gradients. The one to the left (circled) creates an ideal diamond shape to create this effect. Click it to select it, and then trace a line horizontally from the middle of the part of your photo you’d like to make clear.
When drawing a diamond gradient The line you draw will represent the radius of the diamond; the three points that follow will be exactly the same distance to the middle as your lines.
Final Step
If you’re not lucky that initial gradient you draw will not be the correct one. If you’re using your Gradient tool to draw an outline, it’s simple to change. Just create a brand new line and you’ll have the new gradient. If there are areas of blur or sharpness that you wish to highlight or conceal, choose your mask, take the brush and then paint using black to show the sharpness, or with white to show more blur.
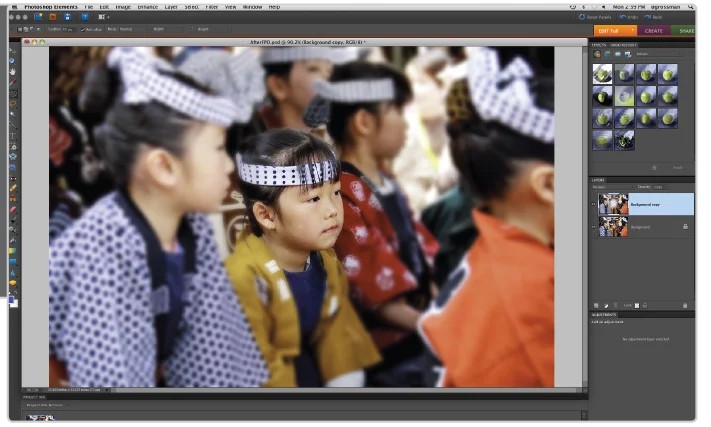
Elements Method
If you’re using Photoshop Elements the tutorial will not work for you. Elements doesn’t have layer masks, which means you won’t be in a position to create the diamond-shaped blur. Additionally, there’s no tool for blurring lenses. However, you can achieve similar results: follow Step 1. In the second you can apply the gaussian blur. To determine what is sharp, you can use the elliptical marquee tools and create a very feathered effect, at minimum 50px. Then, you can circle the area that you want to make to be sharp. Hit the Delete button to create a hole in the layer, and show the sharpness beneath.