

Tripods are fantastic and there’s no doubt about this. When it is about taking ideal low-light photographs, they can be the secret to a great photograph. However, there’s no doubt that they’re not always the ideal option. Some venues do not allow them in, and they can be difficult and slow to work with, especially when you’re working in a hurry and need to get moving quickly.
These are the areas useful in the context of. Below, I’ll give you six methods that will produce stunning low-light pictures without the necessity of tripod. If you’re in a venue that has lighting that is dim or just strolling around the city in the evening the tips below will surely aid you.
Make sure you are ready to kick your photography skills on the go to the next level!
1. Raise the ISO
If you’re making handheld pictures in dim conditions, the first step to consider is increasing the ISO settings on your cameras. ISO determines the sensitivity of the sensor in your camera’s sensor in relation to sunlight. If you increase the ISO it could make your camera more sensitive to light. That means that you’ll be able take great pictures even in dim lighting even if you use an extremely fast shutter speed.
The rule of thumb is simple: the darker scenes, the higher the ISO you’ll need (assuming you’re not planning to decrease the shutter speed). However you shouldn’t restrict to an ISO as high as 25600! Be aware that increasing your ISO too much could make images to appear grainy and soft and therefore it is crucial to figure out the right proportion of ISO as well as shutter speed as the field of view to create the perfect photo.
While you may raise your ISO whenever you need to but you must be sure that you limit it to the minimum level that is feasible. Only increase the ISO only when absolutely necessary and do not push it any further than you’re required to.

A different thing to consider The fact that not all cameras cope with high ISO settings in the same manner. Modern full-frame models perform better than older models. It’s also worth to test your camera’s capabilities using various ISO settings to figure out the optimal settings for your particular camera.
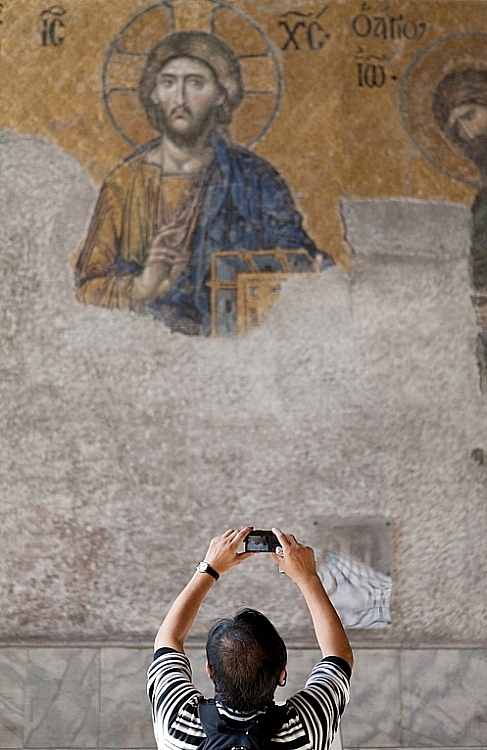
2. Live View mode
Have you taken photos with your camera that was mounted on a tripod, only to find that your image produced blurry pictures? This is an issue that is common, especially for beginners. The root of the issue is easy to fix and the solution is simple.
When you press the button to take a photo after taking a photo the camera’s mirror is turned upwards, which triggers some minor movement. This could result in a blurred and unstable picture. This is the reason Live View could be beneficial. Live View allows you to view live images on the camera’s screen, while the mirror is in a flipping position, this means you won’t be being affected by unwanted camera movement. Certain cameras allow you to disable the mirror, however not in the Live View mode, which means you can use your viewfinder.
By using Live View, you can shoot sharp and clear handheld photos without having to worry about camera shake that could affect your pictures. Make sure to switch on Live View mode whenever you’re taking pictures handheld. This means that you’ll be able to take stunning images in all lighting conditions.
3. Use high-speed burst mode
The most unique features of the most recent DSLR and mirrorless cameras is the speedy burst mode. burst mode is a hidden tool to take stunning pictures even when light levels are low. When shooting handheld, using a burst mode that’s fast can be a lifesaver. But there’s an easy way to do using it: use it only in the event that your shutter is only a little lower than the speed at which that you are able to keep at an unchanging speed.
This is a sample. Let’s assume that you could take a sharp photo at 1:60. In high-speed burst mode, you might be able take advantage of 1/30s as well as 1/45 seconds. This is due to the fact that, at when you snap an image when you are in burst mode produced by pressing the shutter buttons will be reduced before your camera is able capture the next image. So even if some images are blurry, you’re more likely to find several that are clear and useful.
Make sure to select high-speed burst mode, not slower-speed burst modes. Also, make sure to snap a variety of images so that you be able to have a variety of options to choose from. It’s also recommended to try this technique prior to attempting it in a live situation. So, you’ll know what the limit of your ability is and how far you can extend the range of possibilities.

4. Locate a ledge or wall
If you’re shooting photos in dim light, finding the ideal wall or ledge to place your camera on can be an important factor. It’s not only a method to assist in taking steady pictures however, you’ll also be able experiment with different angles for your camera that you aren’t possible to achieve with the aid of tripods.
Before you start taking pictures, there’s an crucial aspect to know that you might have to change the angle of your camera’s lens to avoid taking photos from the wall within the backdrop of your photograph. You can accomplish this using a piece of material you can carry around on your person, like a piece of cardboard or a small rock that can be used to support the camera.
If you’re not able to find the wall or ledge, don’t be concerned! You can still get great shots with other surfaces like the car’s hood, or your ground. With a little imagination, you can make stunning images even in the darkest of light conditions.

5. Make sure you have a bag
As you become more comfortable with photography, you’ll start to build up your personal collection of tips and techniques. A few of the most effective techniques I’ve discovered is to use my backpack that I have used for years to serve as a tripod for a short time. All you need to do is set it on the ground and then place your camera on the top. And voila! You can have a simple tripod, but not the attention that a regular tripod would attract.
(Bonus advice for photographers If you’re shooting photos using an iPhone You could make use of your shoes to hold your phone on the floor! )
This method is helpful in galleries and museums which are places where tripods might not be allowed. You could utilize your backpack to support benches or even place it the tree branch on top (I’ve tried this previously and it has worked).
This hack, you can take clear, steady photos even in dim lighting conditions, without having to carry a heavy tripod or risking getting removed from a location.

6. Learn to train yourself
As with all other aspects of life, photography is an art which you can improve on. This is the same for using your camera safe in low-light situations. Therefore, you need to begin practicing your posture, and make sure that you’re able to hold your camera securely and comfortably.
Step one is to put your elbows inside the camera and keep the camera on one side (unless it is making use of Live View). Make sure you lower your knees and then place your hand on the camera. Instead of pressing the shutter button, press it slowly, ensure that you are making sure you are timing your shot for the end of your inhale. It may appear like a lot, however, it’s actually very effective!
After that, you’ll need to improve your confidence and be able to take a step back when you’re about snapping the shot. After some training, you may be able to operate the camera running at lower speeds than you did previously.
Photography with low-light without a tripod: the last word
Capturing sharp handheld images even in dim light isn’t an easy task but it’s also a great opportunity to discover your artistic side to push photography abilities to the limit. Utilizing the techniques and tips we’ve covered in this article, you’ll be able to create amazing images even if a tripod isn’t the best option.
Remember that increasing your ISO is an effective instrument, but make sure not to increase excessively or your images will appear dull and dull. Making use of Live View will allow you to reduce camera shake, which results in sharper images. Be sure to apply burst mode. This could be a significant element when shooting in low light situations.
The most important point to learn from this article is the necessity to test and play. Utilize your camera with dim light and experiment with different methods. Test different options and find out which is the most effective for you. Be prepared for making mistakes. This is often the best method to improve and learn as a photographer.
So, go out and experience the dark. Take pictures of beautiful things in the dark, and make photos that leave an unforgettable impression. Do not forget to enjoy yourself. Photography is all about showing yourself and enjoying the process.
The next step to accomplish:
What strategies and methods do you employ to take photos in low light without the use of tripod? Share your thoughts below with your suggestions. Comments below!